


INDEX
CONTENTS
16
3
3
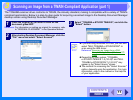
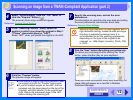
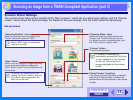
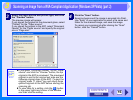
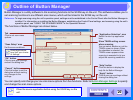
Select the paper source and picture type, and click
the "Preview" button.
The preview image will appear.
If you placed the original on the document glass, select
"Flatbed" for the "Paper source".
If you placed the original in the ADF, select "Document
Feeder" for the "Paper source" and specify the original
size in "Page size".
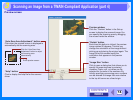
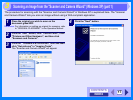
4
Click the "Scan" button.
Scanning begins and the image is acquired into Paint.
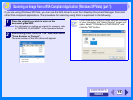
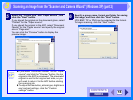
Use "Save" in your application to select a file name and
folder for the scanned image, and save the image.
To cancel your scanning job after clicking the "Scan"
button, click the "Cancel" button.
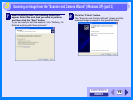
Note
z If you select "Document Feeder" for the "Paper
source" and click the "Preview" button, the top
original in the ADF is previewed. The previewed
original is sent to the original exit area and the
following original stops in the ADF. To eject the
original, press "C (clear)" key and return those
ejected originals to the ADF before starting the
scanning job.
z To view Help for a setting, click the ( ) button
in the upper right-hand corner of the window
and then click the setting.
Scanning an Image from a WIA-Compliant Application (Windows XP/Vista) (part 2)