


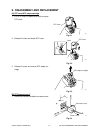

October 2000 © TOSHIBA TEC 6 - 5 KK-1600 DISASSEMBLY AND REPLACEMENT
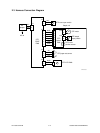
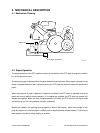
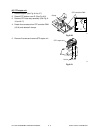
5. Remove 7 screws and remove STP base stay
assembly.
Fig. 6-17
Screw
Screw
STP base
stay assembly
324
[I] STP base
1. Detach STP cover. (See Fig. 6-1 and 6-2)
2. Remove STP staple cartridge. (See Fig. 6-3)
3. Remove stapler. (See Fig. 6-4 to 6-7)
4. Detach STP bottom cover F. (See Fig. 6-8)
5. Detach STP bottom cover R. (See Fig. 6-9)
6. Detach STP staple cover. (See Fig. 6-10)
7. Remove STP cover open switch. (See Fig. 6-11
and 6-12)
8. Remove AC adapter. (See Fig. 6-13)
9. Remove STP LED PWA. (See Fig. 6-14 and
6-15)
8. Remove STP base stay assembly. (See Fig. 6-
16 and 6-17)
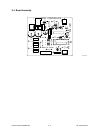
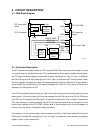
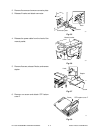
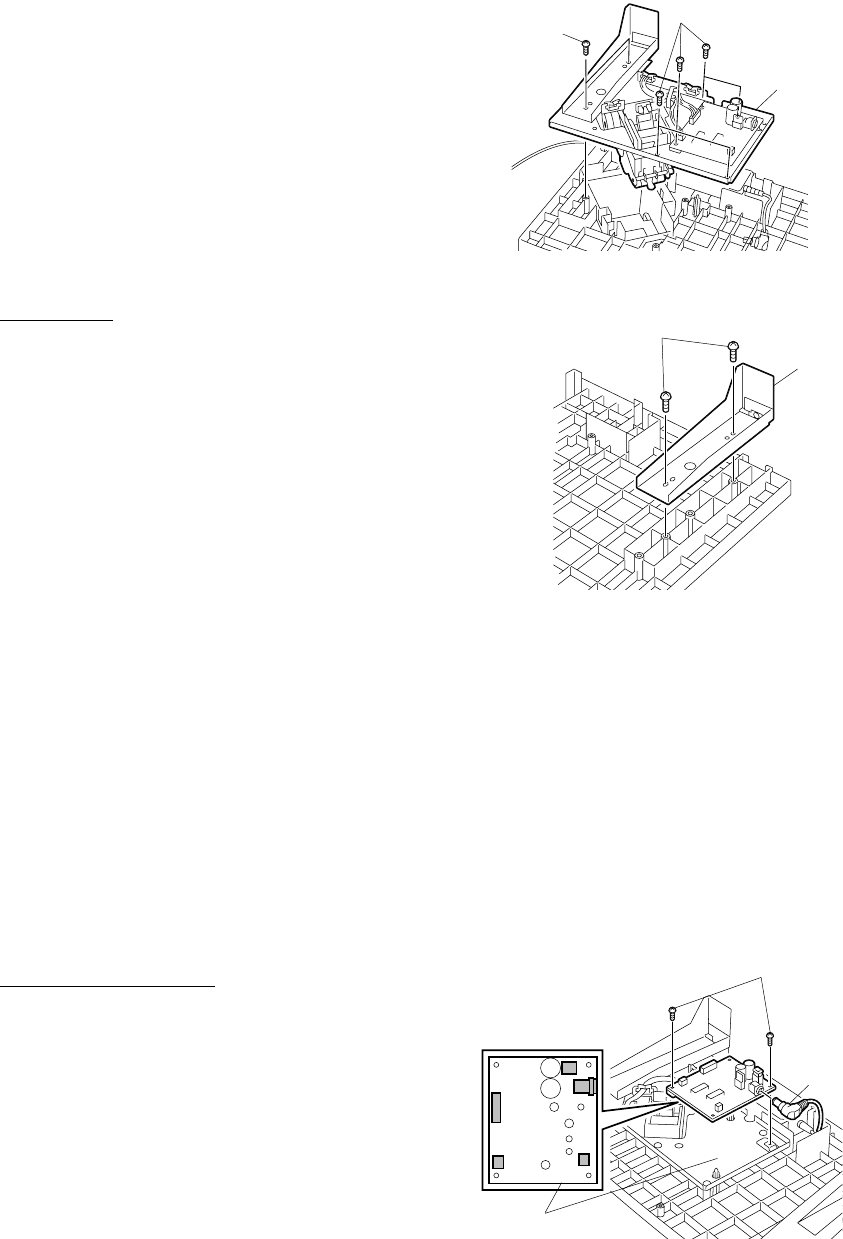
9. Remove 2 screws and remove STP stay.
Fig. 6-18
325
Screw
STP stay
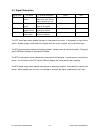
[J] STP controller PWA
1. Remove stapler. (See FIG. 6-4 to 6-7)
2. Detach STP bottom cover R. (See FIG. 6-9)
3. Detach AC adapter jack and all connectors from
STP controller PWA.
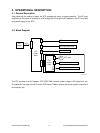
4. Remove 2 screws and remove STP controller
PWA.
Fig. 6-19
STP
controller PWA
Screw
AC adapter
jack
326