


52 53
Operations
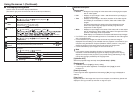
Category
Item
Description
Appli-
cation
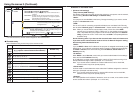
Remote
control
Specify whether to allow the remote control of the projector from a computer.
Allowed
Presentation Forbidden
Allowed: The projector always accepts remote commands from a
computer.
Presentation: Accepts only the remote commands from the computer
by which an image is projected on the projector (Update
automatically) using Network Utility.
Forbidden: Always ignores any remote commands from a computer.
WEB browser
Browser authentication: Switch on/off the password authentication for
access to the setting screen using the Projector
Configuration Tool.
On
Off
Password: Enter the password used to access the setting screen when the
Browser authentication is set to On. A character string (1 to 8
characters) can be specified as desired.
[ : Move left or right one character.] [ to : Set a character.]
Confirm: [OK] [Cancel] [Enter: ]
* To enter characters, use the numeric keypad on the remote control.
L
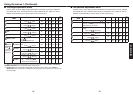
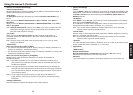
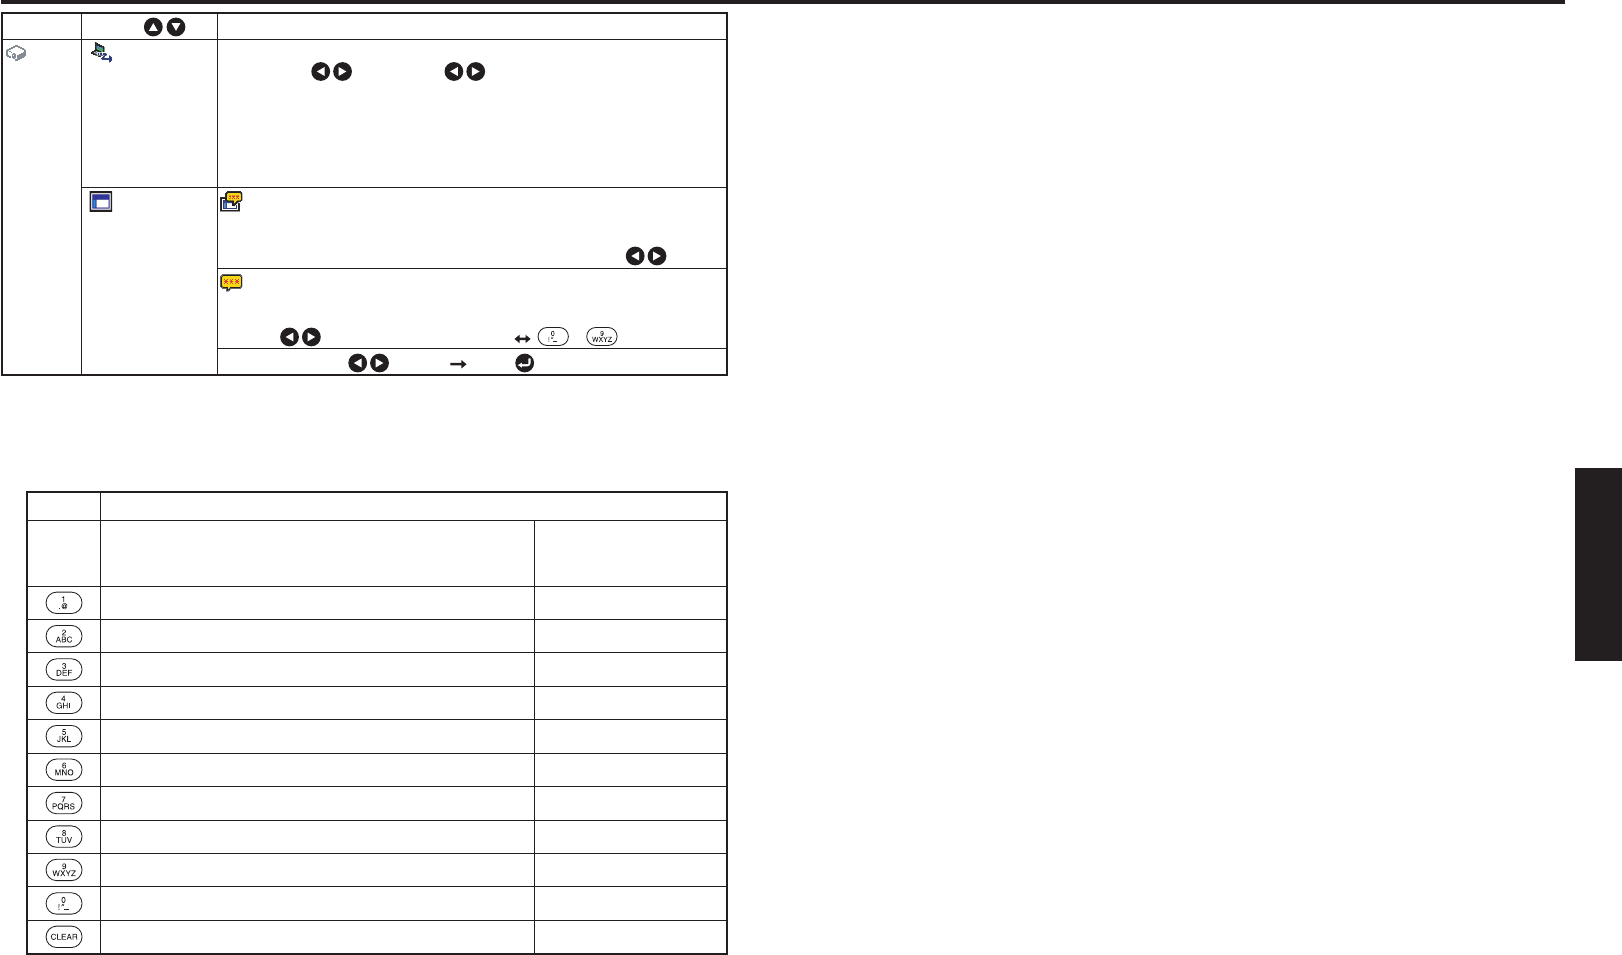
Character entry
Enter characters using numeric keys of the remote control.
Character entry mode
Remote
control
button
Items using characters, numbers, and symbols
(e.g., projector name and destination address)
Number only
“1” “.” “@” “-” “_” “1”
“2” “A” “B” “C” “a” “b” “c” “2”
“3” “D” “E” “F” “d” “e” “f” “3”
“4” “G” “H” “I” “g” “h” “i” “4”
“5” “J” “K” “L” “j” “k” “l” “5”
“6” “M” “N” “O” “m” “n” “o” “6”
“7” “P” “Q” “R” “S” “p” “q” “r” “s” “7”
“8” “T” “U” “V” “t” “u” “v” “8”
“9” “W” “X” “Y” “Z” “w” “x” “y” “z” “9”
“0” “space!"#$%&'()*+,-./:;<=>?@[\]^_`{|}~” “0”
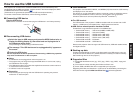
Deletes one character. Deletes one character.
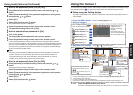
Using the menus 2 (Continued)
L
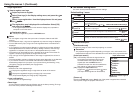
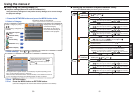
Details on individual items
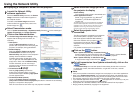
[Wireless LAN settings]
<Easy Connect (USB memory)>
This feature allows users to easily connect the projector to a computer over the network,
without making Wireless LAN settings via Network Utility.
<Mode>
Your projector is set to Ad hoc in the factory. Change the setting if you want to use the
projector in Infrastructure mode.
<SSID>
This is an ID code for connecting to specific individuals over a wireless LAN. This may
also be called “Network group” or “Network name”. Please read the following carefully.
Note: When you use the Ad hoc communication mode, if there is a similar SSID
network group (for example, TDPJ1, TDPJ2, etc.) in the possible communication
area, it is possible that your projector name will not be displayed in the Network
Utility projector list column. If this is the case, set SSID to a completely different
character string.
Set the following items if you have set the communication mode to Infrastructure.
If you have set the communication mode to Ad hoc for Network Projector setting,
the following items should also be set.
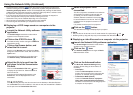
<DHCP>
If you set DHCP to Use, the IP address of the projector is assigned automatically by the
DHCP server. If your network environment does not assign IP addresses automatically,
set DHCP to Not use, then set the following items IP address, Subnet mask and
Gateway manually.
<IP address>
When DHCP is set to Not use, consult with your network administrator for the settings
below and set the IP address manually.
An IP address is a unique number assigned to a terminal. The format is a string of four
dot-separated three-digit numbers. (Example: 111.112.xxx.xxx)
Note: If you set the same IP address for wireless LAN with the one for wired LAN,
network function may fail to operate properly.
<Subnet mask>
A subnet mask is used to determine what subnet the IP address assigned to a terminal
belongs to. (Example: 255.255.xxx.xxx)
Note: If you set the same subnet work for wireless LAN with the one for wired LAN,
network function may fail to operate properly.
<Gateway>
This value specifies the IP address of the device, such as a router, to be used to access
servers outside the network. (Example: 111.112.xxx.xxx)
•