


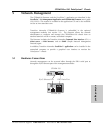

17
CPSMC08xx-100 PointSystem
™
Chassis
chassis
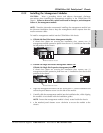
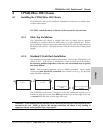
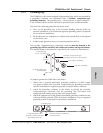
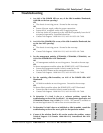
To install the CPSMC08xx-100 chassis into a standard 19-inch rack:
1. Determine the preferred alignment of the chassis in the rack.
NOTE: Installation bracket mounting screws are provided. Rack mount screws
and clip nuts are NOT provided.
2. Locate six (6) installation bracket mounting screws (provided) for each chassis
to be installed.
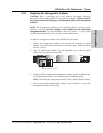
WARNING: Mount the chassis evenly and securely onto the rack. Failure to
observe this warning could allow the chassis to fall, resulting in equipment
damage and/or possible injury to personnel.
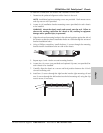
3. Align the universal mounting bracket in the selected position against the side of
the chassis so that the chassis installation holes are visible through the universal
bracket installation holes.
4. Using a Phillips screwdriver, install the three (3) screws through the mounting
bracket into the installation holes on side of the chassis.
5. Repeat steps 3 and 4 for the second mounting bracket.
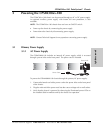
6. Locate four (4) screws (not provided) and optional clip-nuts (not provided) for
each chassis to be installed.
7. Carefully align the chassis at a secure and level position between the 19-inch
site rack mounting rails.
8. Install two (2) screws through the right bracket into the right mounting rail and
two (2) screws through the left bracket into the left mounting rail, using the clip
nuts to secure, if necessary.
24 hour Technical Support: 1-800-260-1312 -- International: 00-1-952-941-7600
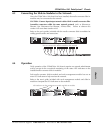
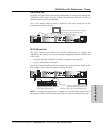
CPSMC-0800
8-Slot Chassis
Mpls, MN 55344
Mpls, MN 55344
Input Power:
Input Power:
110-240 VAC
110-240 VAC
1.6A max. (60W max)
1.6A max. (60W max)
50/60 Hz
50/60 Hz
CPSMC-0800
8-Slot Chassis
Mpls, MN 55344
Input Power:
110-240 VAC
1.6A max. (60W max)
50/60 Hz
Mpls, MN 55344
Input Power:
110-240 VAC
1.6A max. (60W max)
50/60 Hz
CPSMC-0800
8-Slot Chassis
Mpls, MN 55344
Input Power:
110-240 VAC
1.6A max. (60W max)
50/60 Hz