


F L Y C A S E
P R O
E X T E R N A L S T O R A G E P E R I P H E R A L S
w w w. p i k a o n e . c o m
12
S O F T WA R E
I N S TA L L AT I O N
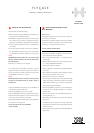
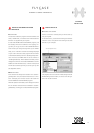
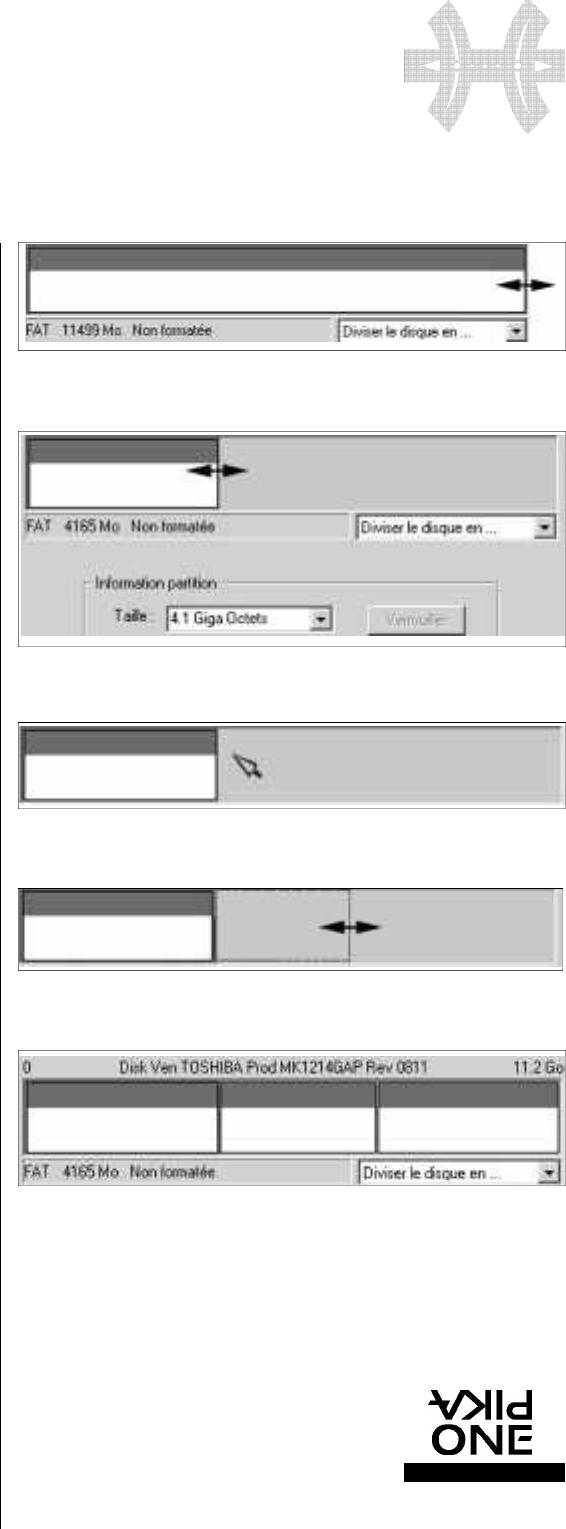
- Click on the right side of the square of the partition to be
modified and adjust the size of the first partition by keeping
the left button of your mouse pressed down and moving it
to the left (screen 1). The size of your partition will be displayed
in real time in the bottom left-hand corner of the square. When
you release the mouse (screen 2), information on the new size
will be displayed next to the “Size” box on your screen.
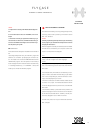
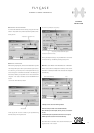
- To create another partition, click on the free gray area as
shown in screen 3, and still keeping the button pressed down,
move the mouse to the left (screen 4).
- Follow the same procedure to create other partitions.
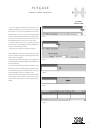
After creating all the sizes of your partitions (screen 5), all that
remains is to define the type of formatting re q u i red and the
name you want to give them:
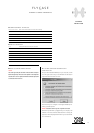
At this point you can always start again; all you need to do is
click on a partition and clear it by clicking on the “DELETE” but-
ton of your software.
• Click on the first partition (red framing indicates the curre n t
selection; see screen 5) and define the type of partition requi-
red using the drop-down menu on the left of the “TYPE” box.
Select FAT (Windows format) or HFS (MAC format).
• Define the name of your partition by clicking on the “NAME”
box and keying in the new name (11 characters max.). Only
use alphanumerical characters. Your disk is ready to be for-
matted.
Screen 1
Screen 2
Screen 3
Screen 4
Screen 5