29
5.4.3 Using Ethernet interface to setup Ethernet interface
1. Connect the computer and the printer to the LAN.
2. Turn on the printer power.
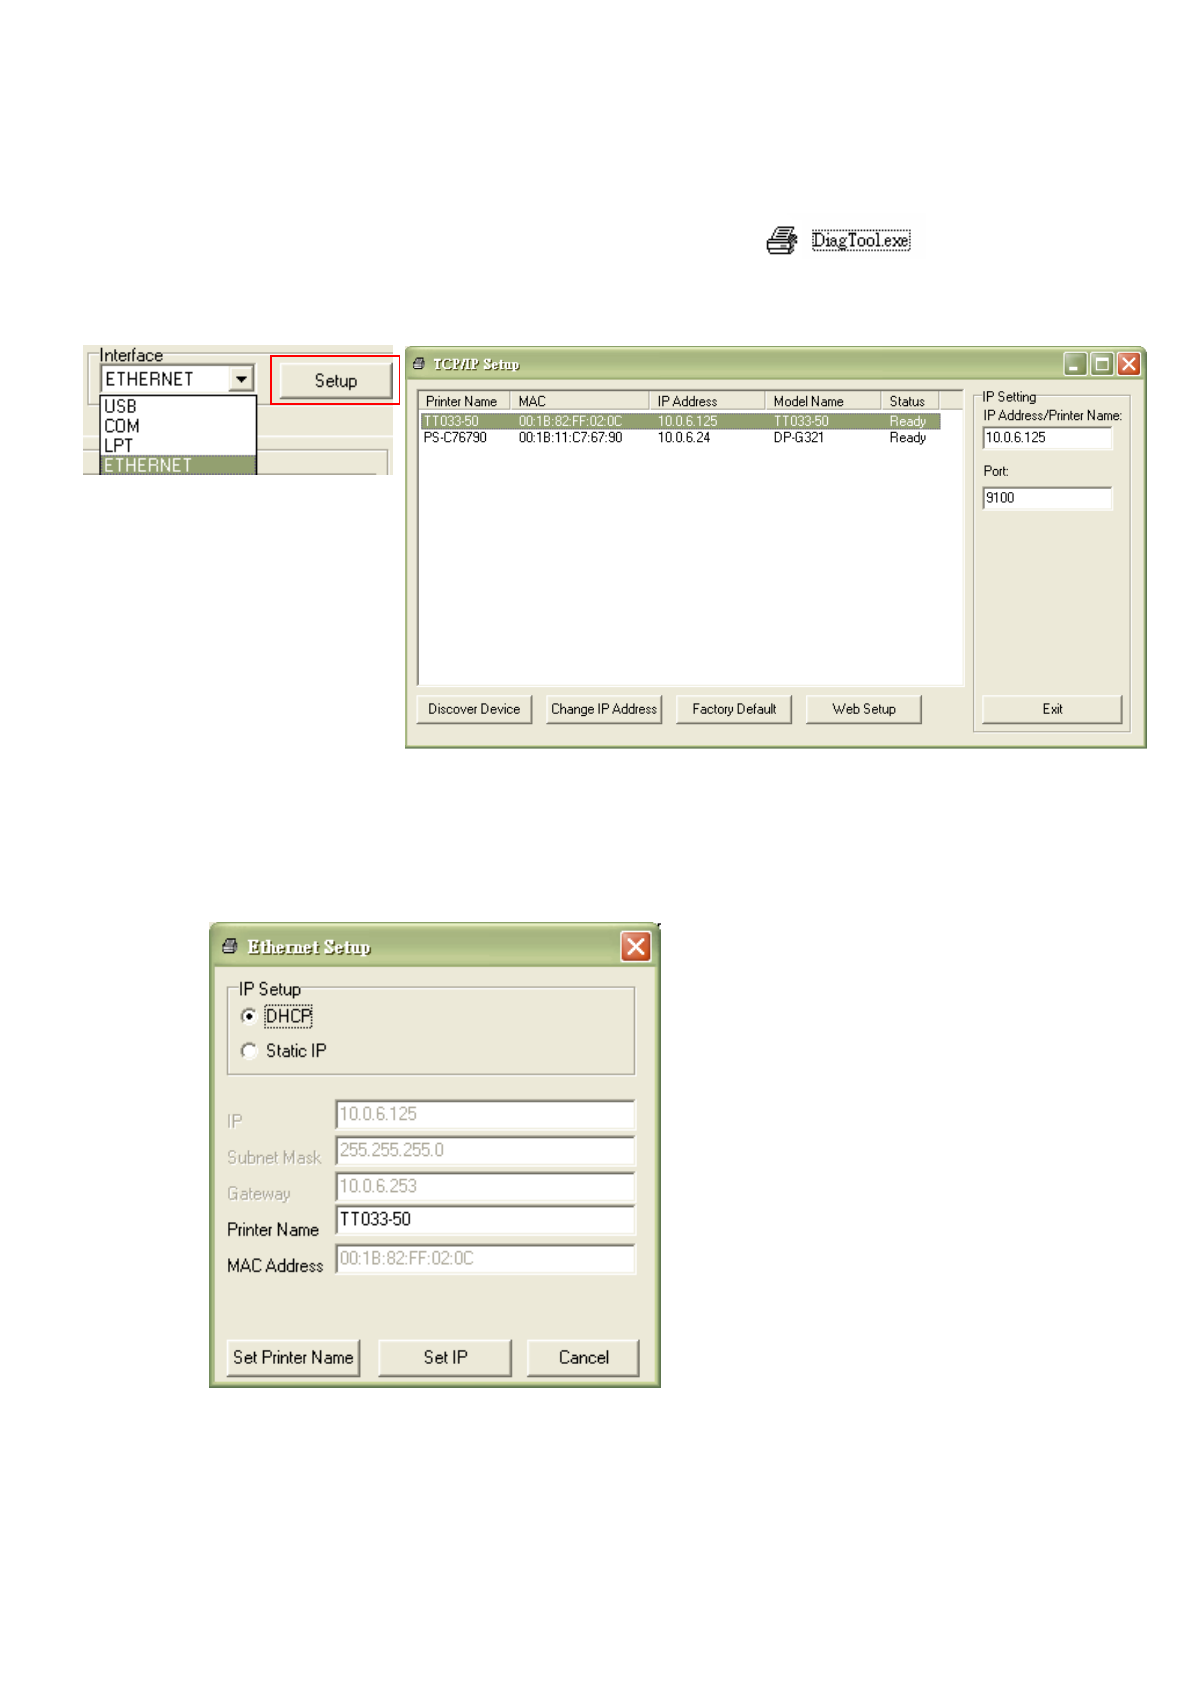
3. Start the Diagnostic Utility by double clicks on the icon.
4. Select “Ethernet” as the interface then click on the “Setup” button to setup the IP address,
subnet mask and gateway for the on board Ethernet.
5. Click the “Discover Device” button to explore the printers that exist on the network.
6. Select the printer in the left side of listed printers, the correspondent IP address will be
shown in the right side “IP address/Printer Name” field.
7. Click “Change IP Address” to configure the IP address obtained by DHCP or static.
The default IP address is obtained by DHCP. To change the setting to static IP address,
click “Static IP” radio button then enter the IP address, subnet mask and gateway. Click “Set
IP” to take effect the settings.


