STEP 3: CHECK OUT YOUR SCANNER 11
7. On the Install Completed window, click Finish.
Your scanner is ready to scan.
8. Before proceeding to “Step 3: Check Out Your Scanner”, you can
install additional software from the installation CD, or view and
print the scanner and PaperPort documentation.
Remove the CD from the computer when you are finished and
store it in a safe place.
STEP 3: CHECK OUT YOUR SCANNER
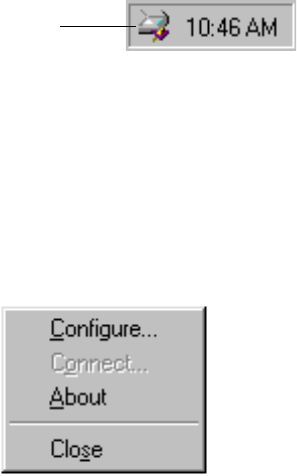
After installing the scanner and software, you will see a scanner icon on
the Windows taskbar (at the bottom right corner of the computer
screen). If the scanner is properly connected, the scanner icon looks like
the one pictured below.
If the icon has a red X through it, the scanner is not properly connected.
See the section, “If the Scanner Is Not Properly Connected” on page 12
for the steps to fix the problem.
To check the status of the scanner:
1. On the Windows taskbar, right-click the scanner icon.
The shortcut menu appears.
2. Select About from the shortcut menu.
A dialog box confirms the scanner is properly connected.
Scanner Icon
