


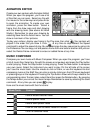

33
Sync
“Syncing” is the process of connecting your ClassMaster™ Notebook to your computer.
It exchanges and updates information between your ClassMaster™ Notebook and your
personal computer. Changes you make on your ClassMaster™ Notebook or your PC
will appear in both places after the Sync process. For example, if you changed records in
your ClassMaster™ Notebook, after Sync, the changes will be updated on the related
files in your computer. Similarly, if there are files that have been changed in your computer,
Sync will update the related files in your ClassMaster™ Notebook
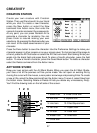
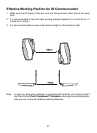
To enhance ClassMaster™ Notebook with this Sync function, an accessory VTech vPort
is needed. The vPort is an electronic device which offers Infrared wireless communication
between your ClassMaster™ Notebook (or any selected VTech learning unit) and your
PC. In the vPort package, there is a CD ROM with the Desktop Software inside. And to
perform a Sync, the Desktop Software must be installed.
With everything ready, the following applications can be synchronized during a Sync
session.
Class Schedule Dictionary
Address Book Calendar
Memo Pad To Do List
Netlink Encyclopedia
Besides, you can download new activities or data from our VTech website (www.vport.com)
to your ClassMaster™ Notebook with the Desktop Software (internet access is required).
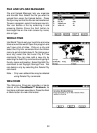
VTech vPort
To purchase the vPort, please directly contact our Customer Service Department at 1-
800-521-2010 in the U.S. or 1-800-267-7377 in Canada.
For details on how to install vPort, please refer to the vPort user manual.
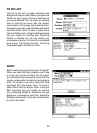
For additional information about using the XL Series™ Desktop Software, open the XL
Series™ Desktop Software and then choose Desktop Help from the Help menu.
To start the XL Series™ Desktop Software, click Start, then Applications, then select
ClassMaster™ Notebook (US).
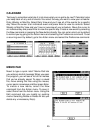
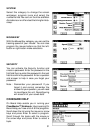
Add a New User Account in Desktop Software
XL Series™ Desktop Software allows multiple users to share the same Desktop Software.
XL Series™ Desktop Software does this by managing different User Accounts.
Each User Account must have a unique name. To create a User Name:
1. Make sure you have been logged out from any account by clicking the Logout button
on the left.
2. Click the New button on the bottom.