


SETTING UP THE NETCENTER – 5
NETCENTER
USER MANUAL
Setting Up the NetCenter
This section contains instructions for positioning, connecting, and powering up the
NetCenter drive.
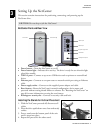
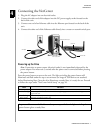
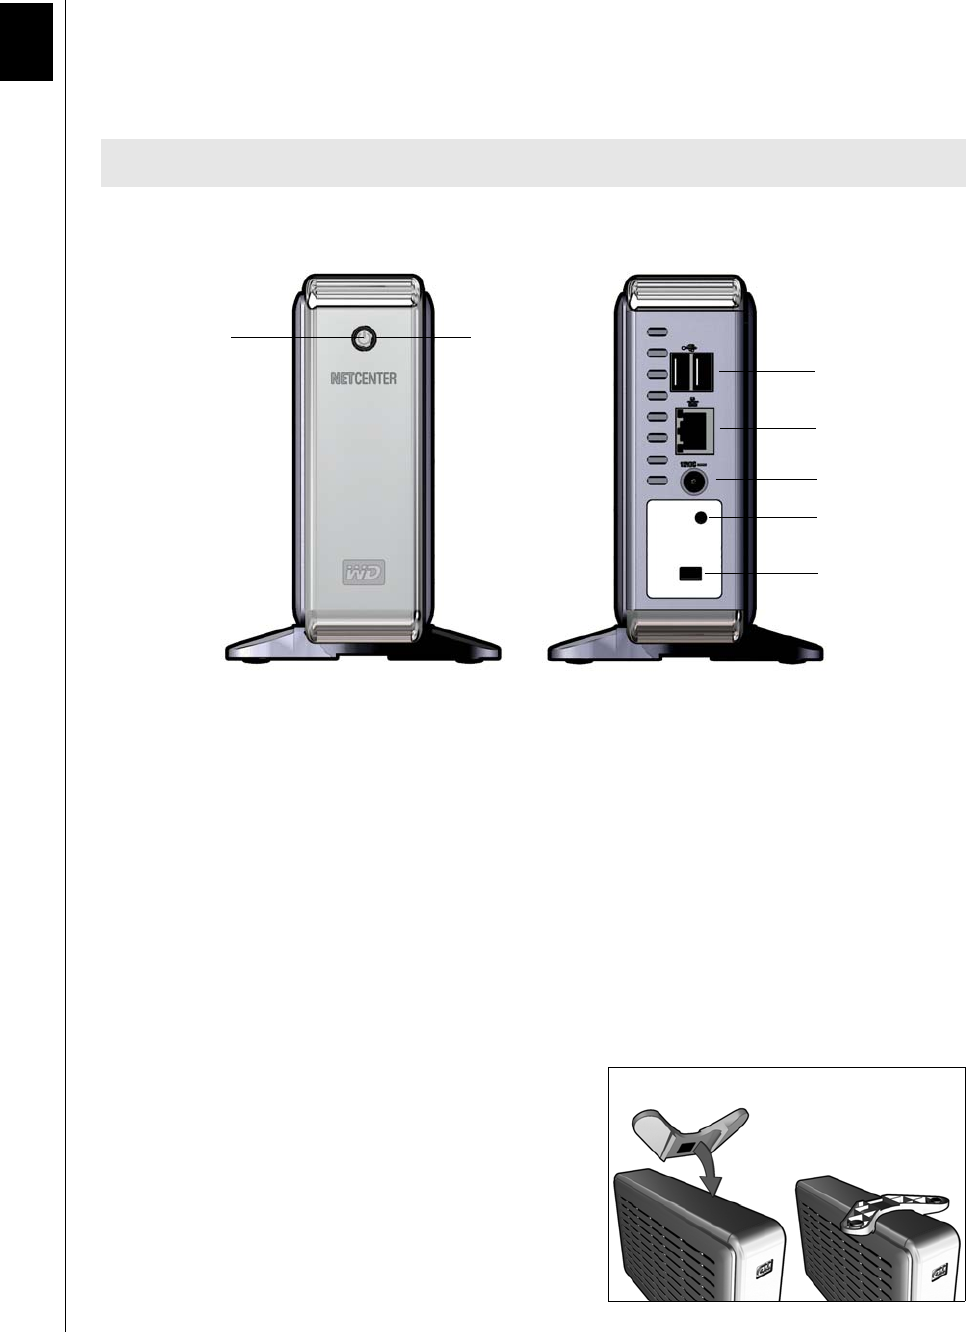
NetCenter Front and Rear View
Power button—Turns the NetCenter on or off
Power button light—Indicates drive activity. The drive is ready for use when the light
glows blue steadily.
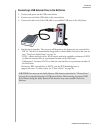
USB 2.0 ports—Connect to up to two USB devices such as printers or external hard
drives.
Ethernet port—Connects to an open router or network switch port using an Ethernet
cable.
Power supply socket—Connects to the supplied power adapter and cable.
Reset button—Resets the NetCenter’s network configuration, device name, and
password without erasing shared folders or volumes. See “Resetting the NetCenter” on
page 8 for more information on using the reset button.
Kensington
®
security slot—Connects to security cable and lock.
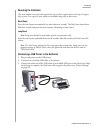
Installing the Stands for Vertical Placement
1. With the NetCenter powered off, disconnect all
cables.
2. Place the drive upside down on a clean and steady
surface.
3. Press a stand onto the bottom panel of the unit
until it snaps into place.
4. Repeat this process for the other stand.
CAUTION: Do not drop or jolt the NetCenter!
3
Power button
Power button light
Front view Rear view
USB 2.0 ports
Ethernet port
DC power supply socket
Reset button
Kensington security slot