


Installation and Configuration
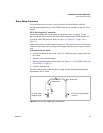
Basic Setup Procedure
32 Operating Manual for Multichannel Functionality (GPIB-M)
Setup
Procedure
For those who want more information, each step refers to more detailed procedures
located in subsequent sections.
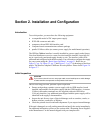
1. Power ON
Power on the unit.
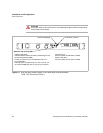
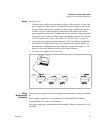
2. Configure Computer Controller
Configure the controller to match the power supply characteristics. The unit is
shipped with default GPIB address 2. Configure your controller to talk to
address 2.
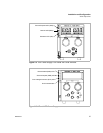
3. Test
Test the link by communicating with the power supply.
Example: Send the ID query “*IDN?” and ensure you get a response. Send the
command ":VOLT 2;:CURR 1" to set voltage to 2V and current limit to 1A.
(Using IBIC
1
this would be ‘ibwrt ":volt 2;:curr 1"’)
See “Change Remote/Local Mode” on page 48 for information about changing
about Local/Remote modes.
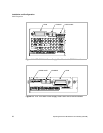
4. Configure power supply
If desired, configure the power supply with the desired power on settings or a
different GPIB address. (Be sure to change the controller address to match.)
See “Power On Remote State” on page 49, “Set Up Power ON Defaults” on page
56, and “Power On Output State” on page 57.
1. This text uses National Instruments' IBIC (Interface Bus Interactive Control) program commands
developed for their GPIB interface for computer controllers as examples only.