


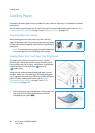
Setting Paper Size and Type
Xerox Phaser 3320DN/3320DNI
User Guide
70
Setting Paper Size and Type
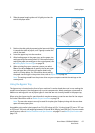
After loading paper in the paper tray, set the paper size and type using the control panel. For computer
printing, select the paper size and type in the application program you use on your computer.
Note: The settings made from the printer driver on your computer override the settings on the
control panel.
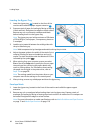
After closing the paper tray the Paper Size and Type settings are automatically displayed. If correct,
use the settings displayed or follow the steps below to change the settings to match the Paper Size and
Type of paper loaded.
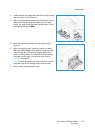
Setting the Paper Size
1. Press Menu on the control panel.
2. Press the up/down arrows to scroll to Paper and press OK. If necessary, enter the Administrator’s
Password using the keypad. Refer to Accessing the Feature and Setup Options on page 76 for
instructions.
3. Press the arrow buttons to scroll to the required Paper Tray and press OK.
4. Press the arrow buttons to scroll to Paper Size and press OK.
5. Press the arrow buttons to scroll to the paper size you want and press OK.
6. Press OK to save the selection.
Note: If you want to use special sized paper, select a custom paper size in the Printer Driver. Refer
to Paper Options on page 38 for instructions.
Setting the Paper Type
1. Press Menu on the control panel.
2. Press the up/down arrows to scroll to Paper and press OK. If necessary, enter the Administrator’s
Password using the keypad. Refer to Accessing the Feature and Setup Options on page 76 for
instructions.
3. Press the arrow buttons to scroll to the required Paper Tray and press OK.
4. Press the arrow buttons to scroll to Paper Type and press OK.
5. Press the arrow buttons to scroll to the paper type you want and press OK.
6. Press OK to save the selection.
Note: If you want to use special sized paper, select a custom paper size in the Printer Driver. Refer
to Paper Options on page 38 for instructions.