Three ways to scan
2-14 4800/2400 Series Installation and User Guide
scanning at a higher resolution creates a larger file size and takes
longer to scan. To minimize the file size and the time required to
get a better quality scan, select just the area of the item that you
want to scan.
To scan an item:
1. Open the scanner cover, place the item face down onto the
lower left edge of the scanner glass, and close the cover.
2. If PaperPort isn’t running, double-click the PaperPort icon on
the Windows Desktop to start it. The PaperPort Desktop
appears.
3. Click the [Scan] icon on the PaperPort command bar and then
click the [Scan] button in the Scan pane.
NOTE: You can also scan from other applications that have the
TWAIN capability. See the user’s guides that you received with
those applications for their specific steps to scan.
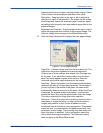
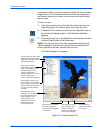
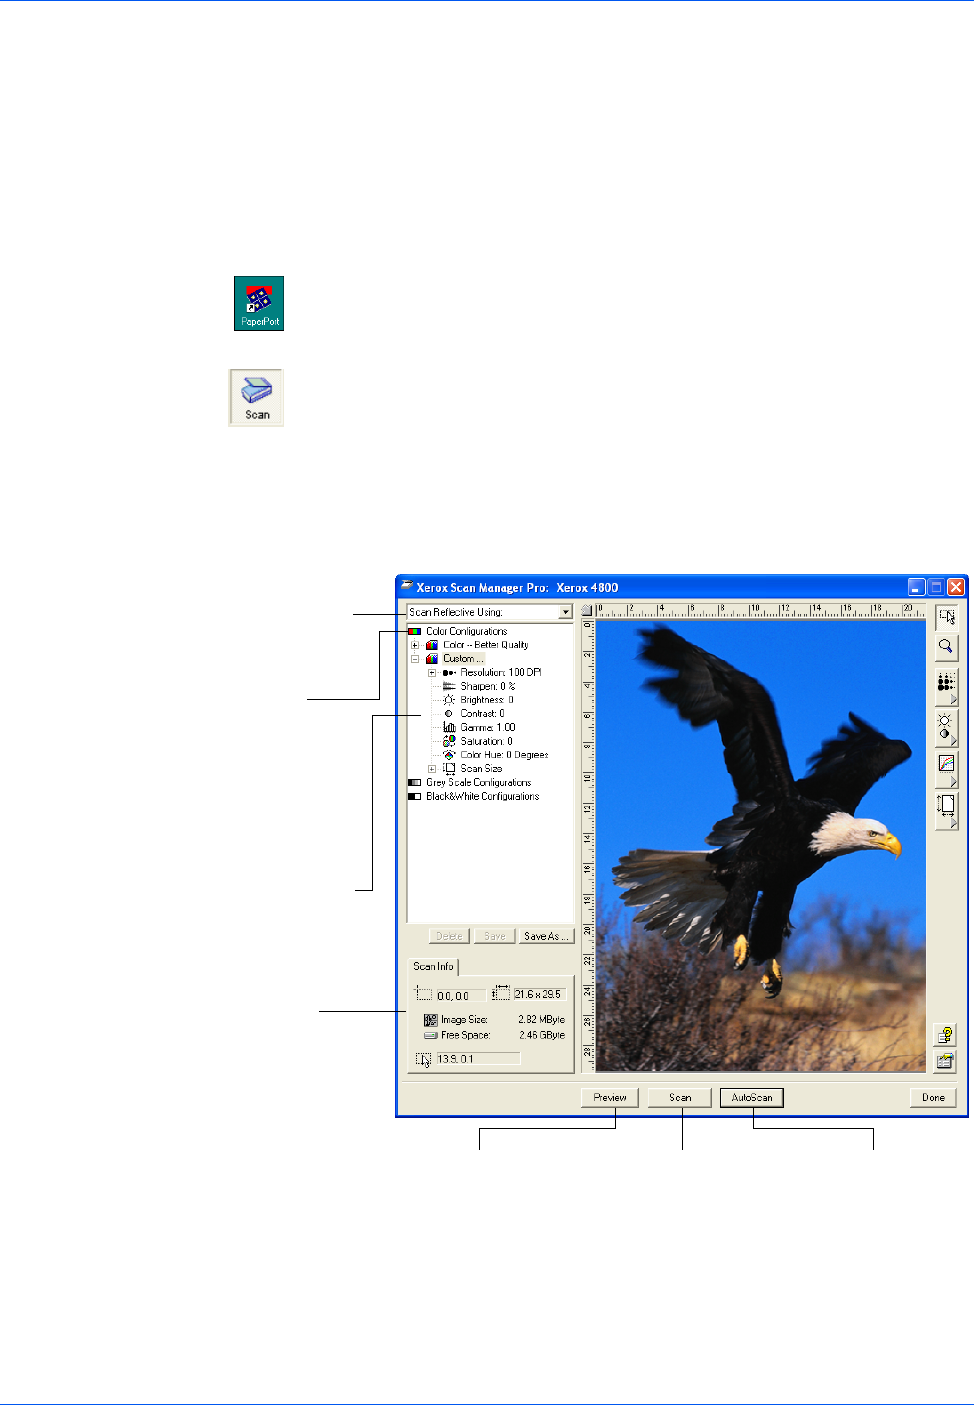
The Scan Manager Pro appears.
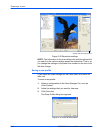
Figure 2-21 Scan Manager Pro
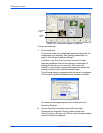
Click an icon to select a
configuration—Color, Grey
Scale, or Black&White. This
example shows the Color/
Custom configuration is
selected. Clicking the “+” sign in
front of Custom shows
Custom’s scan settings as a list.
Click a setting in the list if you
want to change it. The setting’s
options appear on the right side
of the Scan Manager Pro where
you can select new options if
necessary.
Click AutoScan to
scan with your preset
scan choices.
If the image is what you
want, click Scan. If not,
adjust the settings or
select a new configuration
and click Preview again.
Click Preview to see what
the image will look like.
The Preview image appears
in the window.
Check the Scan Info to
make sure your computer
has sufficient space for the
image. Warning icons on
this box appear if your
computer does not have
enough space for the
scanned image’s file.
Choose a scanning option. Scan
Reflective Using is for scanning
paper items. The other options
are for transparencies.


