3
4
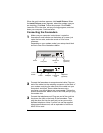
Connect your telephone (optional). You may also connect
your regular telephone to the back of the faxmodem, in the
jack labeled PHONE. If your phone cord doesn’t have an
RJ-11 plug, you may need an adapter for your cord or an
RJ-11 phone cord for your phone. The faxmodem works
with or without a telephone connected to it.
5
Connect the power cube. Plug one end of the power cube
into the back of the faxmodem. Plug the other end into an
electrical outlet. Note: Use only the power cube that came
with your modem. Other power cubes may damage the
faxmodem.
6
Turn the faxmodem on. Depending on the model, there will
either be a switch on the back panel or a pushbutton on the
front panel. The modem will perform a brief self-test. Then
the MR (Modem Ready) or PWR (Power) light will go on.
7
For Windows NT 4.0, continue below.
For Windows 95/98/Me/2000/XP, turn to page 4.
Windows NT 4.0
1
Turn your computer back on. Insert the enclosed CD in
your CD-ROM drive and wait for it to auto-run.
If it doesn’t auto-run: Right-click My Computer and then
click Explore. In the left panel, click on the CD icon of the
drive that has your modem CD in it. In the right panel,
double-click Setup or Setup.exe.
2
When the main interface appears, click Install Drivers.
When the next screen appears, select the modem type you
are installing. Click Install Drivers. When the Modem
Installation Setup screen appears, click Next. Follow the
prompts. Click Finish.
3
Open Start | Settings | Control Panel; double-click
Modems. Note: If the Modem Properties screen appears,
click Add.
4
At the Install New Modem box, click Next. Let Windows
NT detect your modem and install the drivers.
5
Your modem will be detected as a “Standard Modem.” Click
Change. The Install New Modem dialog box will appear.
In the Manufacturers box, scroll to your modem
manufacturer’s name and select it. In the Models box,
scroll to your modem model name and select it. (Refer to
your modem package if you need to.) Click OK.


