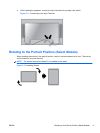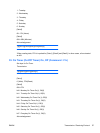
Using the Auto-Adjustment Function
You can optimize the screen performance for the VGA (analog) input by using the Auto/Set button on
the monitor (AUTO button on the remote control) and the auto-adjustment pattern software utility on
the CD provided.
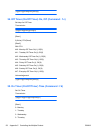
Do not use this procedure if the monitor is using an HDMI to DVI input. If the monitor is using a VGA
(analog) input, this procedure can correct the following image quality conditions:
●
Fuzzy or unclear focus
●
Ghosting, streaking or shadowing effects
●
Faint vertical bars
●
Thin, horizontal scrolling lines
●
An off-center picture
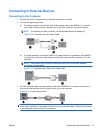
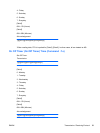
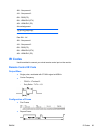
To use the auto-adjustment feature:
1. Allow the monitor to warm up for 20 minutes before adjusting.
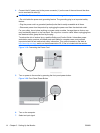
2. Press the Auto/Set button on the back side of the monitor panel.
If the result is not satisfactory, continue with the procedure.
3. Insert the CD in the disc drive. The CD menu is displayed.
4. Select Open Auto-Adjustment Software. The setup test pattern is displayed.
5. Press the Auto/Set button on the back side of the monitor panel to produce a stable, centered
image.
6. Press the ESC key or any other key on the keyboard to exit the test pattern.
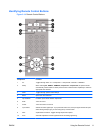
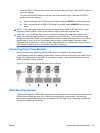
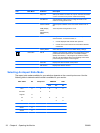
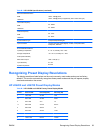
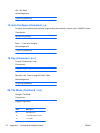
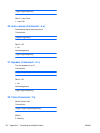
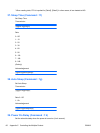
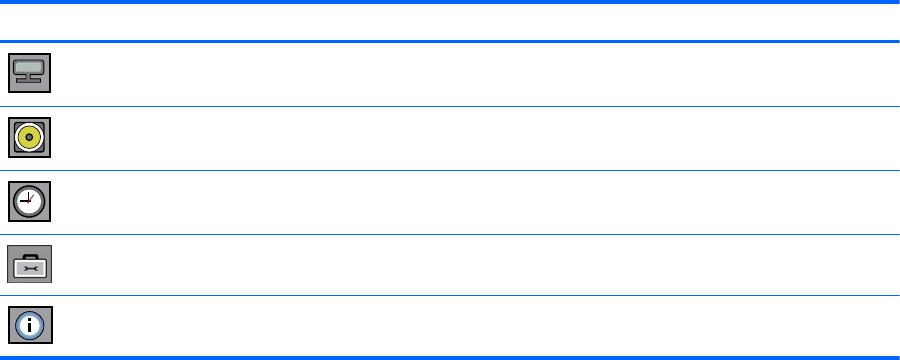
Using the On-Screen Display Menu
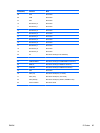
The monitor settings can be adjusted from the On-Screen Display (OSD) menu.
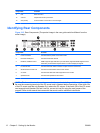
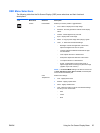
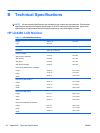
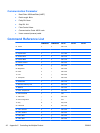
Icon Main Menu Function Description
Picture Adjusts screen brightness, contrast and color
Audio Adjusts the audio options
Time Adjusts the timer options
Option Adjusts the screen status according to the circumstances
Information Adjusts Set ID and check serial number and software version
ENWW Using the On-Screen Display Menu 23