5
For safety reasons, read 1.1 Basic information and preparations (
3, 4
) carefully before
installation. In addition, review the following for proper use of Instant Stack.
• Use the same model projectors.
• Arrange the projectors side by side.
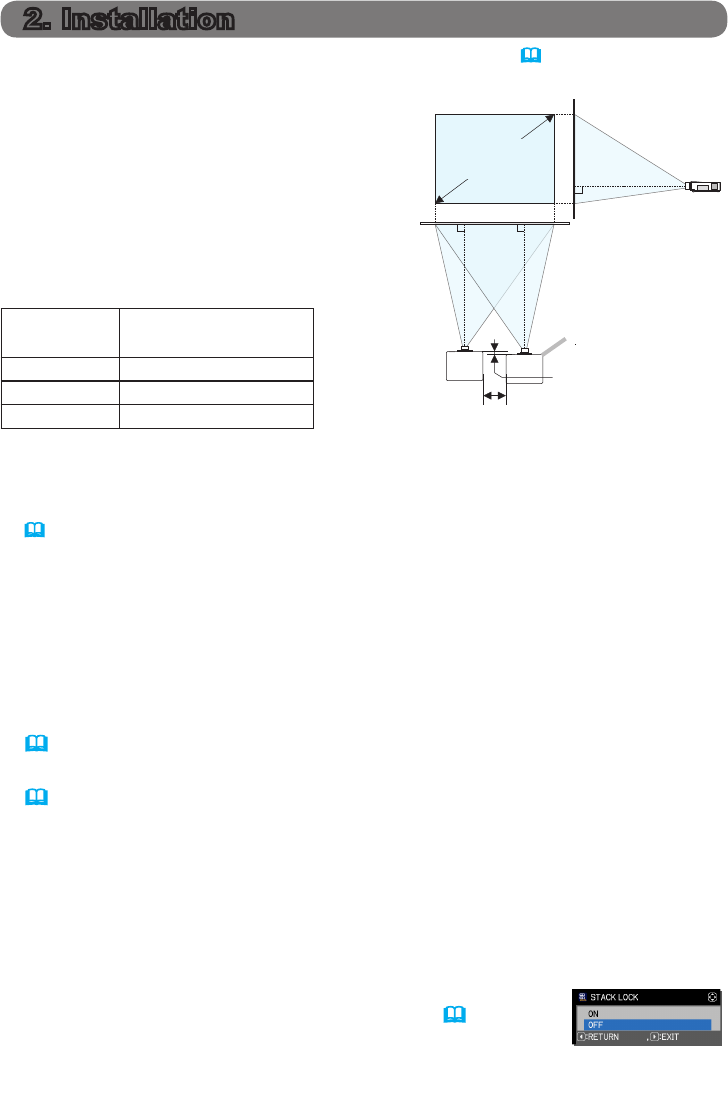
• Verify the projection screen is perpendicular
to the projectors.
• Project images larger than the minimum
screen size shown in the table. The greater the
distance between the projectors, the larger the
screen size needs to be.
L: distance
[cm]
Minimum screen size
[inch]
30 200
50 250
100 380
● If you control one projector with the remote control during installation, we recommend
that you operate the other with the control panel or a wired remote control. In this case,
disable the remote control receiver on the other projector with the KEY LOCK feature.
(Operating Guide → OPTION menu)
● Images from Set A and Set B may superimpose well but the image positions can shift
over time. Readjust to superimpose the images.
2.1 Preparing for Intelligent Stack
When using Intelligent Stack via an RS-232 connection, ensure the following
settings are set up on the two projectors. Otherwise, the Intelligent Stack menu
cannot be selected.
● STANDBY MODE in SETUP menu: NORMAL
(Operating Guide → SETUP menu)
● COMMUNICATION TYPE under COMMUNICATION in SERVICE menu: OFF
(Operating Guide → OPTION menu)
● STACK LOCK in SECURITY menu: OFF
When STACK LOCK is set to ON, menus related to Instant Stack cannot be
selected. Therefore it is necessary to turn STACK LOCK to OFF during Instant
Stack installation and menu set up.
(1) Use the ▲/▼/◄/► buttons to go into the following menu.
ADVANCED MENU > SECURITY (> ENTER PASSWORD)
> STACK LOCK
STACK LOCK dialog will appear on screen. (Operating
Guide → SECURITY menu)
(2) Use the ▲/▼ buttons to highlight OFF, and press the ► button to save the
setting.
2. Installation
L (30cm or more)
Projector
Screen
size
0 ± 10cm


