Contacts 61
Section 6: Contacts
This section explains how to use and manage your
Contacts List. You can save phone numbers to your
phone’s memory.
Accounts
From the Accounts menu you decide if you want
applications to synchronize, send, and receive data
at any given time, or if you want the applications to
synchronize automatically. After determining how
you want the accounts to synchronize, indicate
which account to synchronize with your Contacts
list.
1. Sign in to your Google account.
2. Press ➔ and then tap
(
Settings
) ➔
Accounts and sync
.
– or –
From the Home screen, press and then
tap
Settings
➔
Accounts and sync
.
3. From the General sync settings section, touch
one of the following options:
• Background data
: allows your phone to use data in
the background.
• Auto-sync
: automatically synchronizes your data
with the phone.
4. From the Manage accounts area, tap
next to the account you want to synchronize.
– or –
Tap
Add account
to create a new account.
5. Tap an account type to add.
6. Follow the on-screen instructions. The
selected account type synchronizes with your
Contacts list.
Contacts List
Creating a Contact
The default
storage location
for saving phone
numbers to your
Contacts List is
your phone’s built-
in memory.
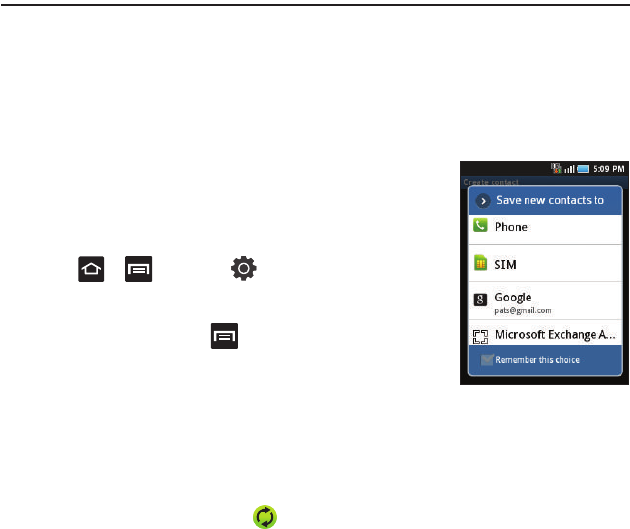
If existing Google
and Corporate
email accounts
have been
synchronized to
your phone, these
will be made available to your device during the
creation of new entries. These new Contacts entries
can be assigned or saved to synced accounts such
as Phone, SIM, Google, or Corporate.
Your phone automatically sorts the Contacts entries
alphabetically. You can create either a
Phone
,
SIM
,
Google
, or
Microsoft Exchange ActiveSync
contact.
