


Connecting to the Network 45
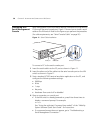
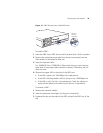
To install a mini-GBIC:
1 Insert the mini-GBIC into a mini-GBIC slot on the front panel until it clicks
into place.
2 Remove the protective covering(s) from the port connector(s).
3 Insert the network cable.
For 1000BASE-SX or 1000BASE-LX fiber, make sure you insert the two
cable ends in the proper sides (transmit or receive). Otherwise, the link
does not work.
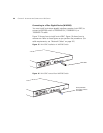
4 Observe the LED next to the mini-GBIC port:
If the LED is green, the 1000-Mbps link is operational.
If the LED is blinking amber, traffic is active on the 1000-Mbps link.
If the LED is unlit, the link is not operational. Check the cable and
verify that the device at the other end of the link is operational.
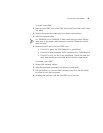
To remove a mini-GBIC:
1 Remove the network cable(s).
2 Insert the protective covering(s) into the port connector(s).
3 Pull the bail latch on the mini-GBIC forward, away from the WX switch,
to unlock it from the front panel.
4 Grasping the bail latch, pull the mini-GBIC out of the slot.