


75 TravelMate 240/ 250
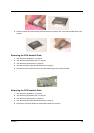
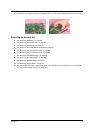
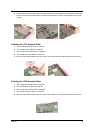
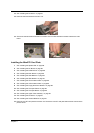
4. Put the mainboard to the lower case. Secure the main board with the two screws as the picture shows.
Fasten the main board to the lower case with another two screws.
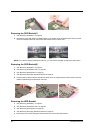
5. Connect the speaker set cable to the main board. Then stick the tape that fastens the speaker set cable.
Connect the launch board cable to the main board.
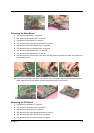
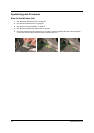
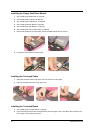
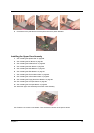
Installing the HDD Bracket
1. See “Installing the Speaker Set” on page 86.
2. See “Installing the DC Board” on page 86.
3. See “Installing the PCMCIA Slot” on page 86.
4. See “Installing the Main Board” on page 86.
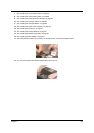
5. Attach the HDD bracket. Then secure the HDD bracket with the four screws.
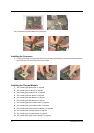
Installing the ODD Module
1. See “Installing the Speaker Set” on page 86.
2. See “Installing the DC Board” on page 86.
3. See “Installing the PCMCIA Slot” on page 86.
4. See “Installing the Main Board” on page 86.
5. See “Installing the HDD Bracket” on page 87.