


4
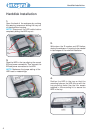
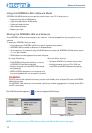
Harddisk Installation
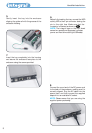
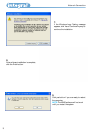
1.
Open the back of the enclosure by undoing
the securing screws and sliding the tray out
of the aluminium housing.
NOTE: Disconnect the LED cable before
completely sliding the HDD tray out .
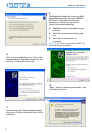
3.
Place the HDD in the tray aligning the correct
IDE and power connectors. Then connect the
IDE and power connectors to the HDD.
NOTE: Make sure the jumper setting of the
HDD is set to master/single
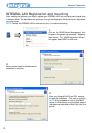
2.
Write down the ID number and KEY before
closing the enclosure. It is going to be needed
in later stages of the network installation.
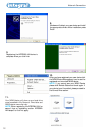
4.
Position the HDD in the tray so that the
mounting holes on the HDD line up with the
tray mounting holes. Use the four screws
supplied in the mounting kit to secure the
HDD in the tray.
POWER
CONNECTOR
IDE
CONNECTOR
LED
CABLE
Harddisk Installation