


5
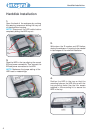
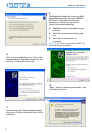
5.
Gently insert the tray into the enclosure
aligning the guide rail with the grooves of the
enclosure housing.
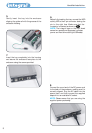
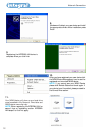
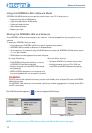
7.
Insert the tray completely into the housing
and secure the enclosure face plate to the
enclosure using the screws provided.
6.
Before fully inserting the tray, connect the HDD
activity LED to the 4-pin connector leaving the
pin to the right free. Make sure that the
connector is inserted as shown on .
NOTE: The integral logo on the front bezel
serves two operational purposes: indicates
power and hard drive activity(in U S B mode).
8.
Connect the round end of the DC power cord
to the back of the enclosure, making sure it is
correctly aligned. Plug the AC cable into the
power pack, and then connect the supplied
adapter into an available AC socket.
NOTE: Please ensure that you are using the
supplied power pack only.
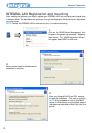
Harddisk Installation