


English
9
2. Hardware Installation
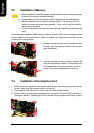
2.1. Installation of a Socket A CPU and Fan Sink
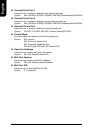
2
When the CPU is inserted into its position, gently press the
metal lever downwards until a click is heard. Then add an
even layer of heat sink paste between the CPU and fan sink
for heat dissipation.
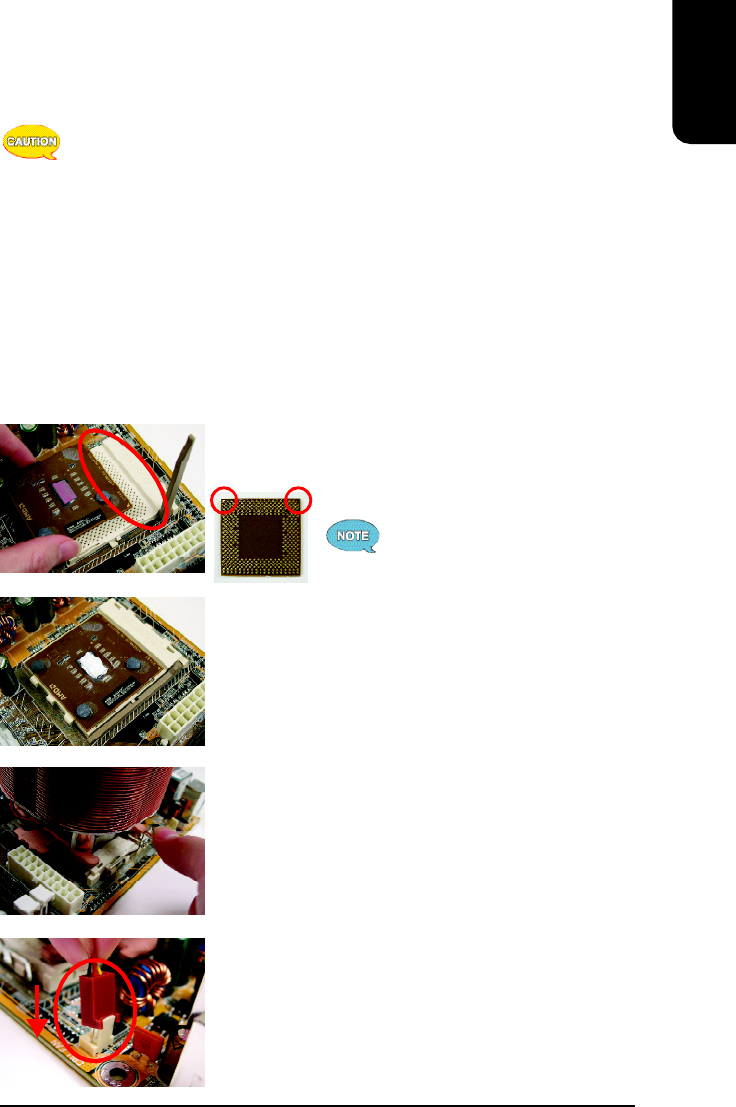
3
Position and attach the clips on one end of the fan sink firmly
atop the CPU. Please do the same for the clips on the other
end of the fan sink.
1. Please make sure that the CPU used is supported by your motherboard.
2. Please be aware of the placement position of the CPU. If the CPU does not
insert properly, do not apply force but check the placement position.
3. Please make sure that an even layer of heat sink paste is added between the
CPU and the fan sink.
4. Please do not turn on the power prior to installing the fan sink. Doing so can
result in overheating and lead to permanent damage to the CPU.
5. Please follow the CPU specifications when setting the frequency. It is not
recommended that system speed settings exceed that of hardware
specifications. If you wish to set your system speed to exceed the recom
mended specifications, please check your hardware specifications eg: CPU,
graphics card, memory, hard drive
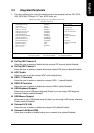
1
Note the small gold colored triangle on one corner of the CPU.
Place the triangle in the corner closest to the metal lever and
4
Connect the 3-pin cooler power connector to the CPU Fan
connector located on the motherboard.
gently insert the CPU into its position.
A Socket A CPU has two indented
corners and these corners must be
properly positioned during installation.