


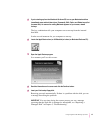

6 Insert a high-density floppy disk into the disk drive.
A message tells you when it’s time to insert another floppy disk.
7 Lock each disk as you remove it from the computer. Label the disks to indicate the order
in which you create them (for example:
Backup 1
,
Backup 2
, and so on).
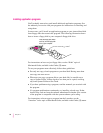
To lock a disk, turn it label-side down and use a pen or your fingernail to slide
the tab in the lower-right corner of the disk so that the square hole is open.
(The disk has two square holes, but only one of them has a moveable tab.)
8When a message appears telling you that you’ve finished, store the labeled and locked
floppy disks in a safe, cool place.
Using Apple Backup to update your backup copy
If you made a backup copy of your hard disk information on floppy disks
using Apple Backup, you can keep your backup copy up-to-date by following
the instructions here.
By the way: Another way to make sure you have up-to-date information is to
use a new set of floppy disks to create your backup copy, preserving your
original backup. If you are using a fresh set of floppy disks, follow the
instructions in the previous section, “Using Apple Backup for the First Time.”
1Get the floppy disks that you used to make a previous backup copy.
Have some extra high-density disks on hand in case there is more information
on your hard disk than there was the last time you made a copy.
2 Turn on your Macintosh, if it’s not already on.
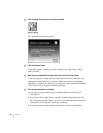
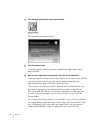
3Click the Applications grouping button in the Launcher.
The buttons for application programs available in the Launcher are grouped
under the Applications button.
43
Using Programs and Backing Up Disks