


7Click the button that corresponds to your choice.
Make sure you have enough time and disks to complete the copying. If you
stop the copying before it’s done, you’ll have to start over from the beginning.
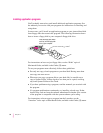
8Unlock your first backup floppy disk.
To unlock the disk, turn the disk label-side down and use a pen or your
fingernail to slide the tab in the lower-right corner of the disk so that it covers
the square hole. (The disk has two square holes, but only one of them has a
moveable tab.)
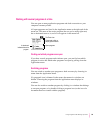
9 Insert the disk into the floppy disk drive.
If you did not unlock the disk correctly, it is ejected and a message appears.
Unlock the disk, making sure that the tab snaps into place, and try again.
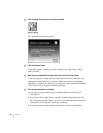
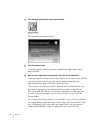
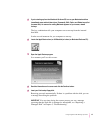
A message appears, telling you that the disk contains information.
10 Click the Continue button.
If there is a problem with the disk, a message appears. Otherwise, copying
takes place automatically. A sound alerts you when it’s time to insert another
disk.
11 When the disk is ejected, lock and label it.
To lock a disk, turn it label-side down and use a pen or your fingernail to
slide the tab in the lower-right corner of the disk so that the square hole
is open.
12 Repeat steps 7 through 11 for each disk in your stack of backup disks.
Apple Backup lets you know when you’ve finished.
13 Store the disks in a safe, cool place.
45
Using Programs and Backing Up Disks