


ASUS K8N-E Deluxe motherboard
5-21
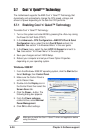
5.5.2 NVIDIA
®
RAID configurations
The motherboard includes a high performance IDE RAID controller
integrated in the NVIDIA
®
nForce™ 3 250 Gb chipset. It supports RAID 0,
RAID 1, RAID 0+1, and JBOD configurations. Use the NVIDIA
®
RAID
utility to configure a disk array.
Setting BIOS RAID items
After installing the hard disk drives, make sure to set the necessary RAID
items in the BIOS before setting your RAID configuration.
To set the BIOS RAID items:
1. Boot the system and press <Del> during the Power-On Self-Test
(POST) to enter the BIOS Setup Utility.
2. Go to the Advanced > Chipset > Onboard Device menu item in the
BIOS.
3. Set the RAID Option ROM item to Enabled. A new set of BIOS items
appear.
4. Set the Primary Master as RAID and/or Primary Slave as RAID
items to Enabled.
5. Save your changes and Exit Setup.
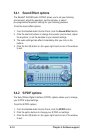
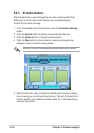
Entering NVIDIA
®
RAID BIOS Utility
To enter the NVIDIA
®
RAID BIOS utility:
1. Boot your computer.
2. During POST, press <F10> to enter the NVIDIA
®
RAID configuration
utility.
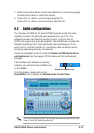
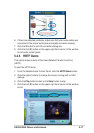
Launching the NVIDIA
®
RAID Manager
To launch NVIDIA
®
RAID Manager from Windows
®
XP:
Click the Start button. Select All Programs > NVIDIA Corporation >
RAID Manager > RAID Manager.
For detailed descriptions on the NVIDIA
®
RAID configuration, refer to
the “NVIDIA
®
RAID User’s Guide” found in your motherboard support
CD.