


5-3
Administering ASAI
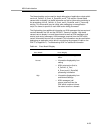
5. Select any name you choose and enter it into the “Name” field. Although it
is not necessary, you may want to choose the same name given to the split
on the PBX. To display the PBX name for the split, type list hunt at the
DEFINITY Generic 3i system console. Find the hunt group with the group
extension corresponding to your VIS ACD extension. Use the name (if
any) shown for that group.
6. Enter ACD in the “Type” field.
7. Enter the group extension of the VIS ACD split in the “Ext” field.
8. Enter VIS in the “Service” field. By choosing VIS as the service, you have
designated this ACD split domain as the VIS ACD split domain.This
instructs the ASAI to send call information it receives from this domain to
the voice response service(s) that service the VIS Agent lines.
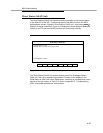
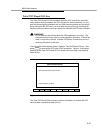
9. Press SAVE to save the domain and its parameters. The Domain Adminis-
tration screen should be redisplayed, similar to that shown in Figure 4-9,
but now showing the domain that you have just entered.
10. Press the cursor keys until the domain is highlighted. Press ENABLE to
bring the domain into service. Once you have pressed ENABLE, the VIS
automatically enables the domain should the voice system be restarted
after a system shutdown or power loss. You do not need to use the
ENABLE key again to enable the domain unless you have disabled the
domain by pressing the DISABLE key. The STATUS field should change
to inserv.
11. If the STATUS field shows inserv, proceed to the information Administering
the VIS Agent Lines in this chapter. If the STATUS field does not show
inserv, refer to Appendix D, “Troubleshooting ASAI” for information on trou-
bleshooting a domain.