


18 Audio Authority AVAtrix User Manual
Audio Authority AVAtrix User Manual 19
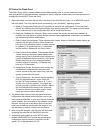
PC Setup Via Flash Card
The AVAtrix Setup Utility is already loaded onto the ash memory card, or you can download it from
www.audioauthority.com/page/software. Highlights of the PC Utility are covered here, but more information is
available by clicking HELP inside the Utility.
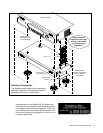
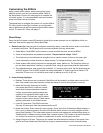
1. Remove the ash card from the slot in the rear panel of the AVX-562 and insert it in an MMC/SD compat-
ible card reader. The Utility should launch automatically in any Windows™ operating system.
a. Name of Conguration. Enter up to 32 characters to describe this conguration. This is the “label”
that will be visible on the AVAtrix panel display when loading setup les. This name is not the same
as the “lename.cfg” for this conguration as it will be saved onto the card.
b. Restriction Feedback for View-lock. When a user restricts the source, and restriction feedback is
enabled, the video blinks to indicate that the command was implemented. If feedback is not enabled,
the feature works without visible effect.
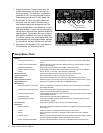
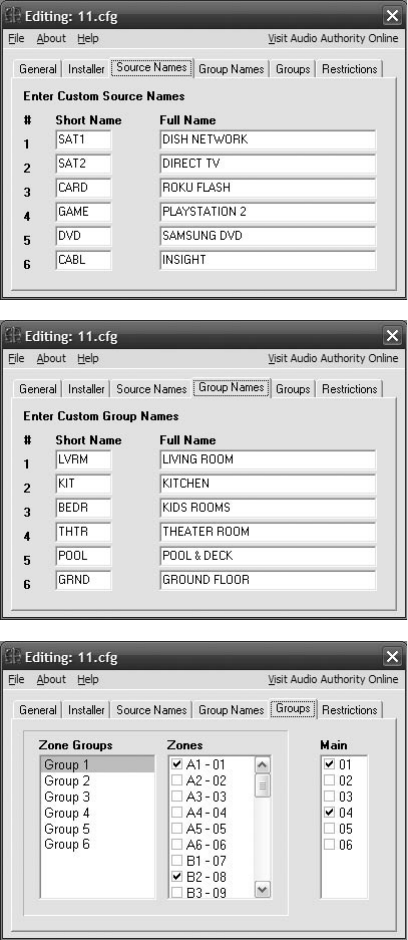
c. Enter Custom Source Names. These names are the “labels” shown on the AVAtrix panel display rep-
resenting the six input positions. Short names may
have up to four characters (letters, numbers, spaces
or symbols). Full names may have 13 characters,
and are visible in Residential and Group views.
d. Enter Custom Group Names. These names are the
“labels” shown on the AVAtrix panel display repre-
senting each of the six available output zone groups
(groups of wallplate/receiver locations). Short group
Names may have up to four characters (letters,
numbers, spaces or symbols). Full Names may
have up to 13 characters.
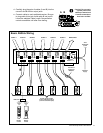
e. Assign Zone Groups. Each group may contain any
combination of wallplate/receivers from matrix
routers, as well as the main output. Any zone may
appear in more than one group.
f. Source Restrictions. Any source may be restricted
from any wallplate/receiver. Under Zones, se-
lect the Cat 5 output address (Row A, B, C, etc.)
and the zone (column) number. Then check any
sources you wish to prohibit at this location. Select
the next wallplate and proceed in the same way.
To restrict a source from the Main output, simply
check the Source number under Main.
2. The AVAtrix ash memory cards are issued with blank
conguration les already saved onto the card, so you
may overwrite these les, or save your le with a new le
name; however, you must retain a .cfg extension on the
lename. You may use a new blank card, but the card
must have at least one conguration le saved to it by
this application in order to function with the AVAtrix.
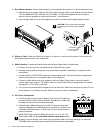
3. After saving the setup le (.cfg le), plug the ash card
containing the setup le into the AVAtrix card slot.
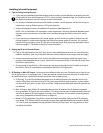
4. Temporarily apply power, go to the SETUP menu,
choose SAVE/LOAD FILE, choose the desired setup
conguration le and follow the instructions on the
screen. The 3-digit password is 2-3-6.