


6-1
Controlling
5975938 BARCOREALITY 9200TCR+ 020798
6
Ceiling
Screen
IR sensor
RCU
RGB V
RGB
H / C
V
On
98 27910
R
G
B
H / C
V
H
RS 232 I N
REMOT E
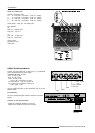
PROJECTOR MODE :
GREEN - OPERATION
RED - STANDBY
COMMUNICATION PORT
(800-PERIPHERALS)
RS232 OUT
IR-ACKNOWLEDGED
IR-RECEIVED
DIAGNO S TI CS
CODE IR-RECEIVER
0
I
This device complies with Part 15 of the FCC r ules. Operation
is subject to following two conditions :
(1) This device may not cause harmful interference
(2) This device must accept any interference received
including interference that may cause undesired operation
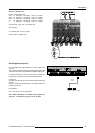
R
G
BV
RGB
H / C
V
On
98 27910
RGB
H / C
V
H
RS 232 IN
REMOTE
PROJECTOR MODE :
GREEN - OPERATION
RED - STANDBY
COMMUNICATION PORT
(800-PERIPHERALS)
RS 232 OUT
IR-ACKNOWLEDGED
IR-RECEIVED
DIAGNOSTICS
CODE IR- RECEIVER
0
I
This device complies with Part 15 of the FCC rules. Opera tion
is subject to following two conditions :
(1) This device may not cause harmful interference
(2) This device must a ccep t any interference received
includ in g interf ere nce that may cause und esi red op er ati on
ADDR
ADJEXIT
STBY
MUTETEXT
BRIGHTNESS
-
+
-
+
-
+
-
+
SHARPNESS
-
+
TINT
COLOR
CONTRAST
0
9
7
8
6
5
4
3
2
1
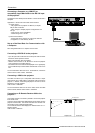
RCU
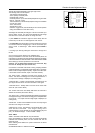
Front of projector
IR sensor
ADDR
ADJ EXIT
STBYMUTETEXT
BRIGHTNESS
-
+
-
+
-
+
-
+
SHARPNESS
-
+
TINT
COLOR
CONTRAST
0
9
7
8
6
5
4
3
2
1
RCU
Rear of projecto
r
IR sensor
Table
45° 45°
45° 45°
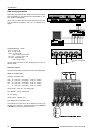
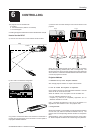
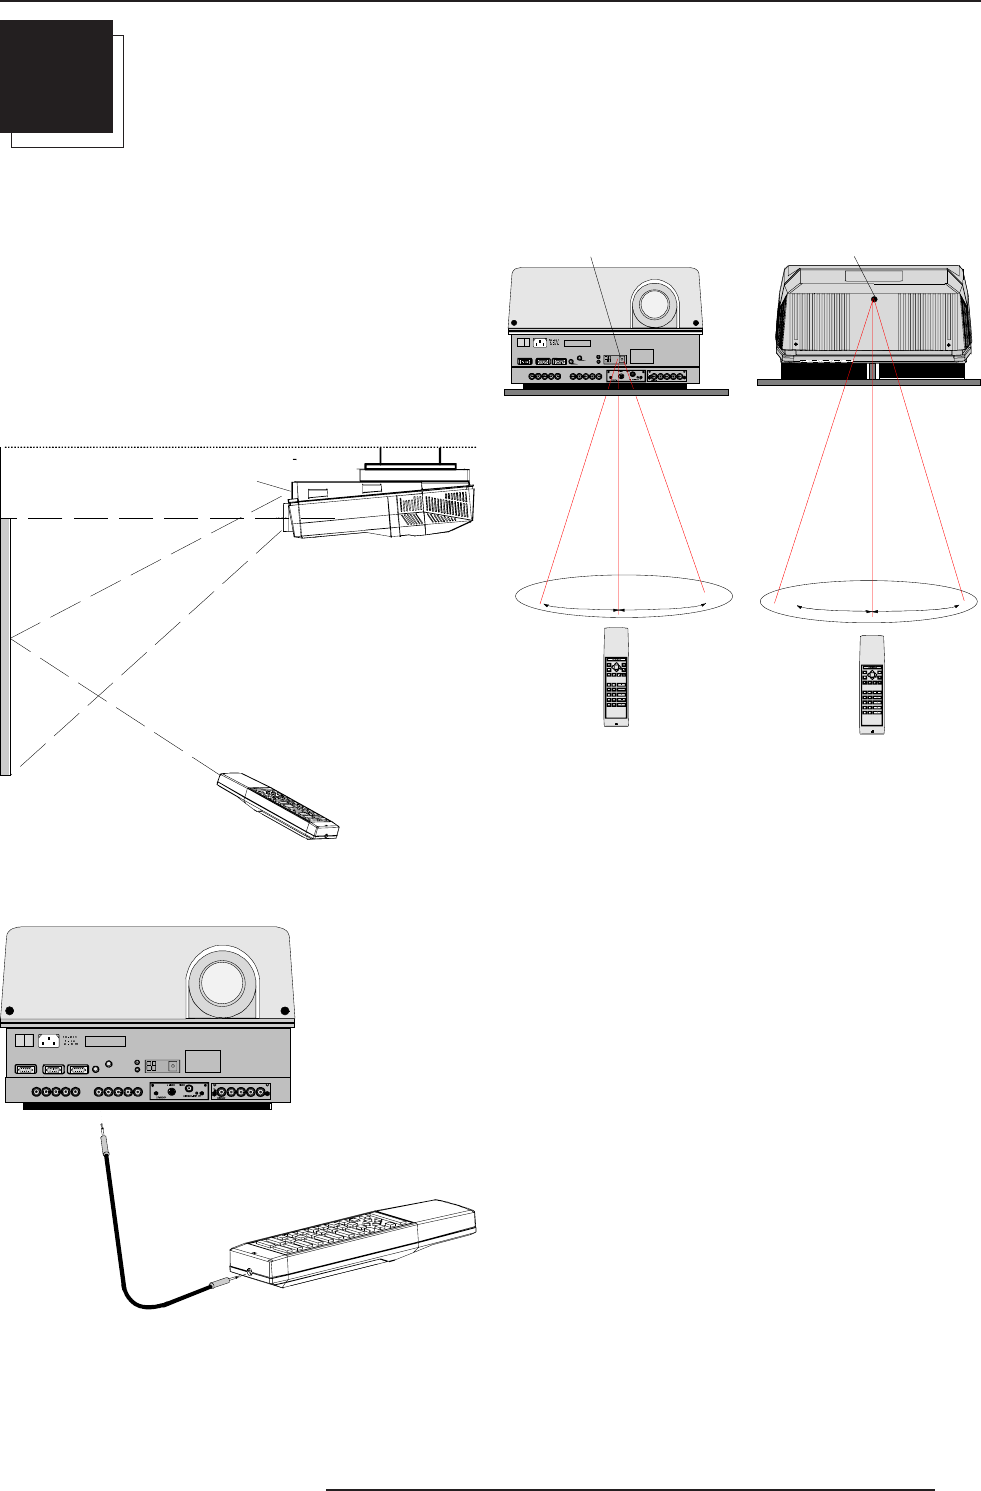
CONTROLLING
The projector can be controlled with
a. The RCU
b. The hardwired RCU (cable is not included)
c. The local keypad.
Controlling the projector with the RCU and the hardwired RCU is equal.
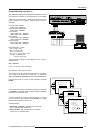
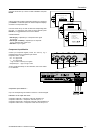
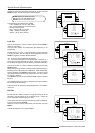
How to Use the RCU?
a) Point the front of the RCU to the reflective screen surface.
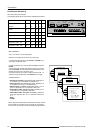
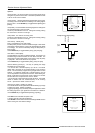
b) RCU used in a hardwired configuration.
Plug one end of the remote cable in the connector on the bottom of
the RCU and the second side in the connector in the front panel of
the projector labelled 'REMOTE'.
When using the wireless remote control, make sure you are within
the effective operating distance (30m, 100ft in a straight line). The
remote control unit will not function properly if strong light strikes the
sensor window or if there are obstacles between the remote control
unit and the projector IR sensor.
Projector Address
a. Software Set up of the Projector Address.
See 'Change projector address' in chapter 'Service mode'.
b. How to Control the Projector or Projectors.
Every projector requires an individual address between 0 and 255
which can be set in the Service mode.
When the address is set, the projector can be controlled now :
- RCU for addresses between 0 and 9.
- Computer, e.g. IBM PC (or compatible), Apple MAC, etc. for
addresses between 0 and 255.
Note : A projector will respond to a RCU set to an address of '0'
regardless of what address is set in the projector itself.
c. Using the RCU.
Before using the RCU, its is necessary to enter the projector address
into the RCU (only when that address is between 0 and 9). The
projector with the corresponding address will listen to that specific
RCU.
When address 0, <zero> is programmed into the RCU, every projec-
tor, without exception will listen to the commands given by this RCU.
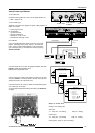
c) Point the front of the RCU directly at one of the IR sensors of the
projector.