3-4
Installation Guidelines
R5976336 BARCOSLM R6 Executive 06092001
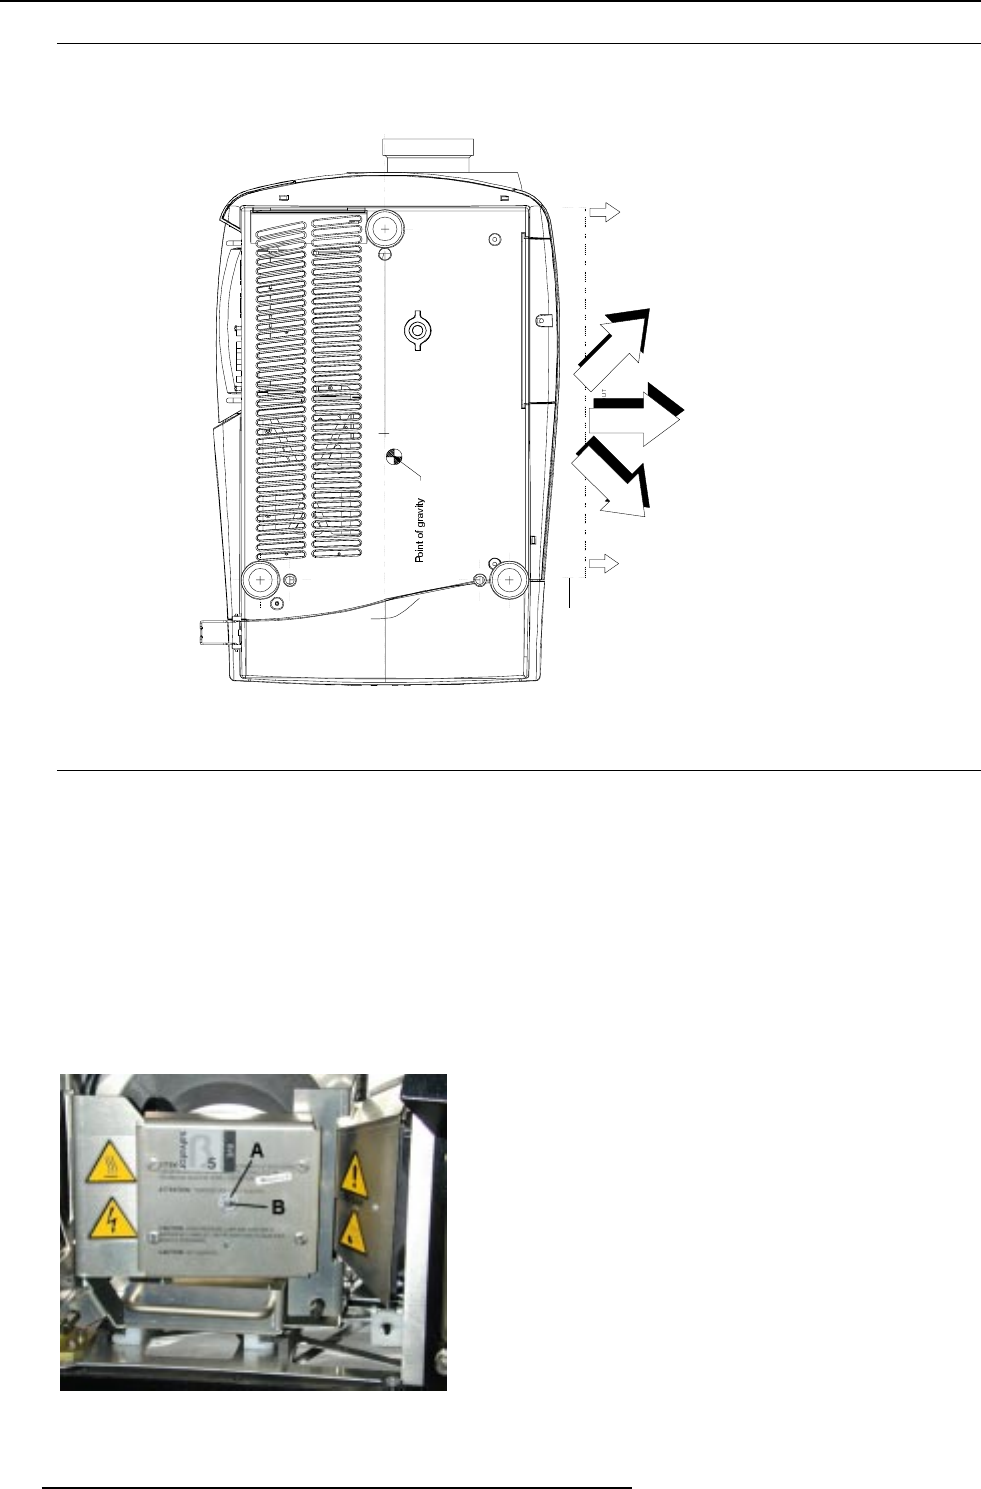
Image 7
Re-adjusting the lamp position in the lamp casing
With higher run times, the light output of the lamp will decrease, which results in a lower light output on the screen.
This light output decrease can be compensated by readjusting the position of the lamp.
As the projector has to be opened, this procedure has to be performed by qualified service technician..
Handle as follow :
1 On the side of the inputs, turn the retaining bolt a quarter counter clockwise.
2 Flip the cover to the left side and take off.
3. Start up the adjustment mode and select Service.
4. Select Lamp. The Z-axis indication (lamp menu in service mode) will be helpful while turning screw B (image 7).
5 Loosen the nut A (image 7) on the back of the lamp casing (nutdriver 10).
6 Adjust the screw B (image7) with an allen key by turning a little clockwise until the maximum light output is reached (the maximum
value of the Z-AXIS indication on the lamp menu).
7 Fasten the nut on the back of the lamp casing to secure this position (nutdriver 10).
Image 6
Safety Area around the Projector
Make sure the projector is located so that the air inlets and outlets for the cooling system are not obstructed.
Leave a safety area of about 1 meter on the left and the right side of the projector.
Safety area for blow out
hot air


