7-15
Random Access Adjustment Mode
R5976336 BARCOSLM R6 Executive 06092001
Blanking
What can be done ?
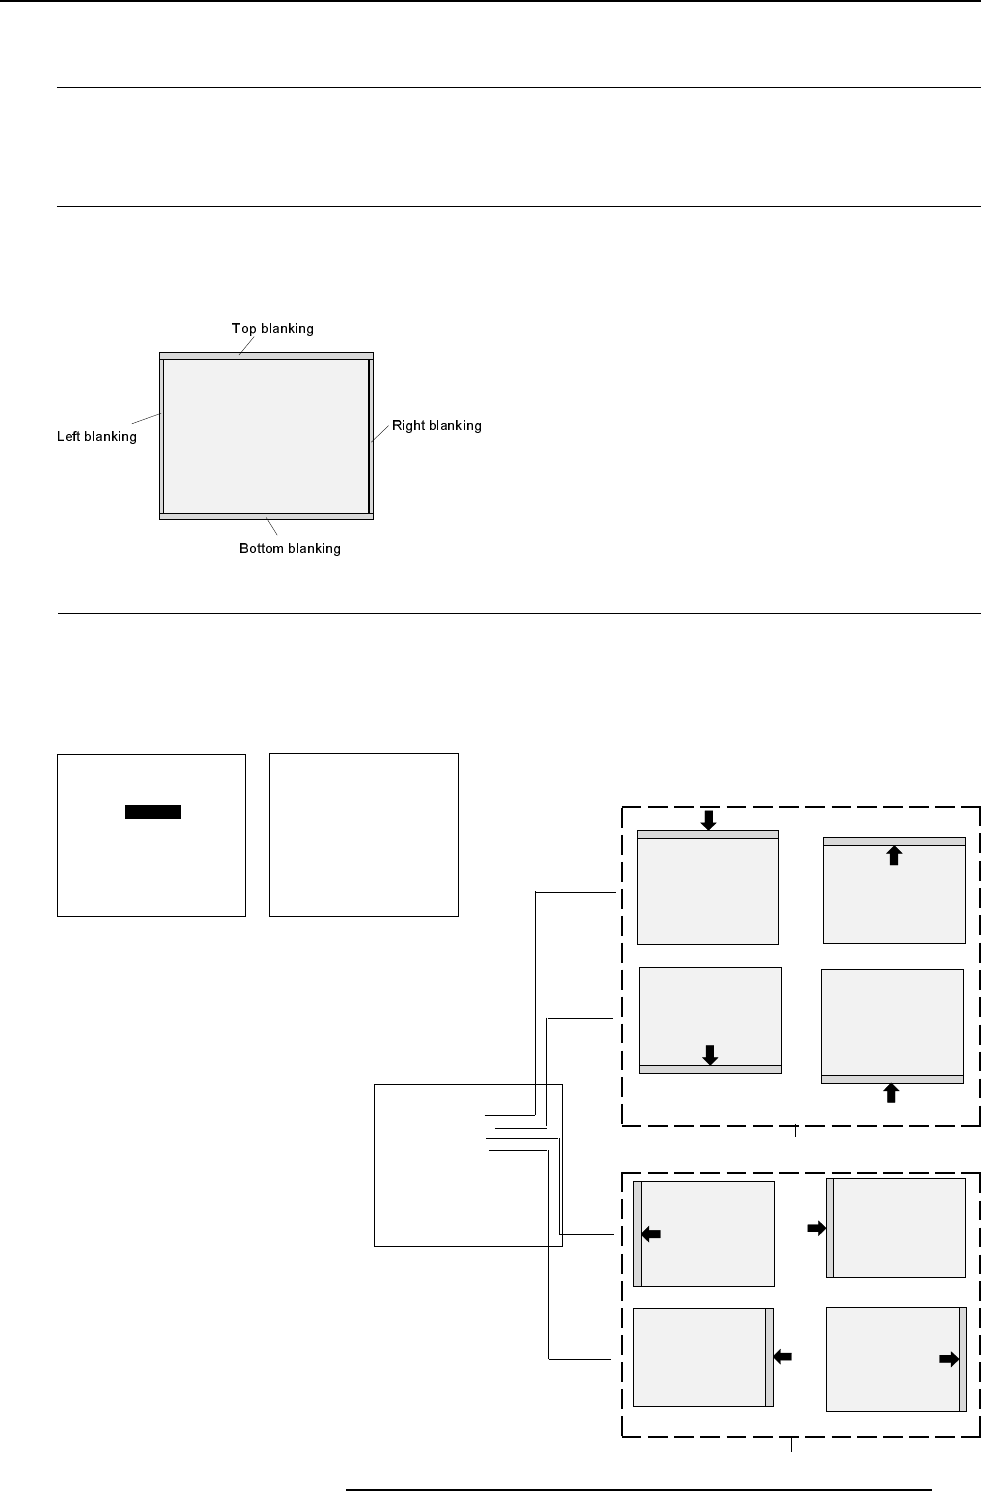
Blanking adjustments affect only the edges of the projected image and are used to frame the projected image on to the screen and
to hide or black out unwanted information (or noise). A '0' on the bar scale indicates no blanking.
Available Blanking Adjustment.
- top blanking
- bottom blanking
- left blanking
- right blanking
Adjusting the blanking.
1 Push the cursor key é or ê to highlight 'Blanking' (menu 1).
2 Press ENTER to display the blanking menu.
3 Push the cursor key é or ê to highlight desired blanking (menu 2).
4 Press ENTER to start up the chosen blanking.
5 Use the cursor keys to adjust the blanking.
BLANKING
TOP
BOTTOM
LEFT
RIGHT
Select with é or ê
then <ENTER>
<EXIT> to return.
menu 1 menu 2
Adjustment of the blanking on the top of the image
Adjustment of the blanking on the bottom of the image
Correct by pushing the control disc up or down
Adjustment of the blanking on the left side
Adjustment of the blanking on the right side
Correct by pushing the control disc to the right or to the left
BLANKING
TOP
BOTTOM
LEFT
RIGHT
Select with é or ê
then <ENTER>
<EXIT> to return.
Select with é or ê
then <ENTER>
<EXIT> to return.
GEOMETRY
SHIFT
SIZE
BLANKING
ASPEC RATIO [4:3]
