


Using the BayStack 303 and 304 Ethernet Switches
2-6 893-01010-A
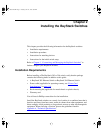
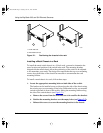
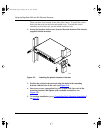
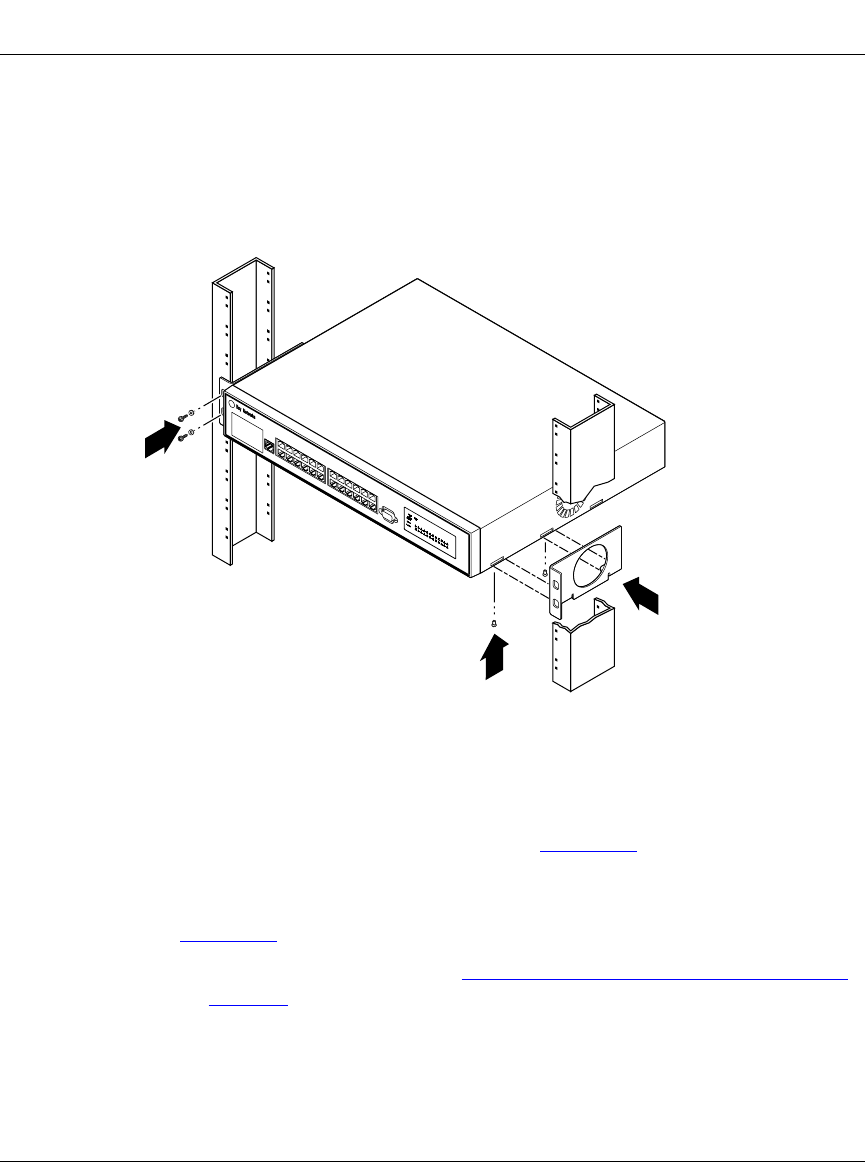
There are three slots located on the side of the chassis. To install the switch
flush with the rack, use the front and middle slots. To install the switch
extended out from the rack, use the middle and back slots.
2. Secure the brackets with screws (inserted from the bottom of the chassis)
supplied with the brackets.
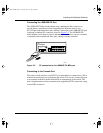
Figure 2-3. Installing the plastic chassis in the rack
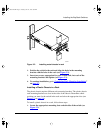
3.
Position the switch in the rack and align the holes in the mounting
bracket with the holes in the rack (see Figur
e 2-3).
4. Insert two screws, appropriate for your 19-inch rack, into each of the
mounting brackets and tighten with a suitable screwdriver (see
Figur
e 2-3).
5. To continue installation, go to “Completing Rack Mounting Installation”
on page
2-7.
7528FB
89301010.BK Page 6 Tuesday, June 10, 1997 8:00 PM