


11
1. Insert the installation disk into the computer and, with the
supplied cable, attach the Direct Connect to the
computer. The “Add New Hardware Wizard” will start.
Select “Search for the best driver for your device.
(Recommended)”. Click “Next”.
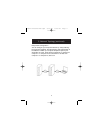
2. The “Add New Hardware Wizard” will find the Belkin USB
Direct Connect and inform you that it has finished
installing the drivers. Click “Finish”.
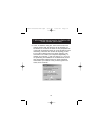
3. The “Add New Hardware Wizard” has placed a program
on your desktop called NETSETUP. Double-click on the
icon to start the setup program.
4. Choose “Typical Installation (Recommended for most
users )” and click “OK”.
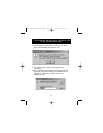
5. Select a name for your computer that is different from the
other PCs to which you are trying to connect, (for
example, computer 1). This will identify individual PCs
within the network. Click “Next”.
6. Enter a workgroup name for your network (for example,
My Network). This name will be the same on all of your
computers. Keep in mind that the workgroup name is
case-sensitive and must be spelled identically on all
computers in your network. When you have entered a
name, click “Next”.
7. Enter a description. This is optional and is intended to
help further identify a computer (for example,
Computer 1 Windows Me). This may be left blank if you
prefer. When you have entered a name, click “Next”.
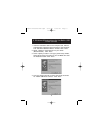
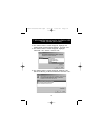
8. The “Enter IP address?” window will now appear.
Click “Yes” under “Do you want to assign your own
IP Address?”.
7. Windows Me Instructions for the Belkin USB
Direct Connect
P73162-A-F5U104-man.qxd 8/15/01 2:40 PM Page 11