Introduction 11
English
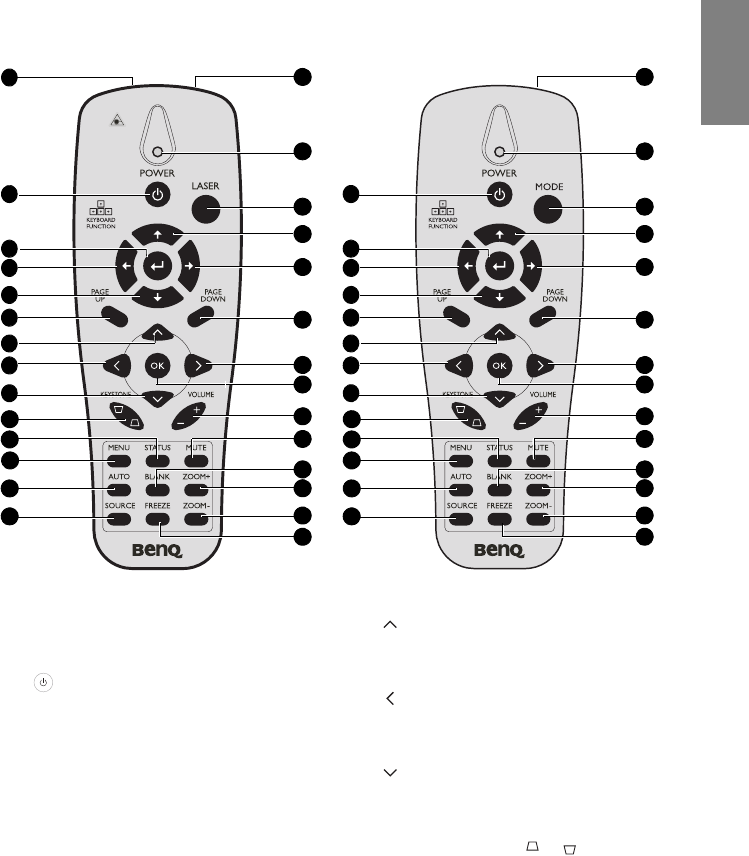
Remote control
1. Laser (Standard Remote only)
Use as on-screen pointer.
DO NOT POINT IN EYES.
2. POWER
Toggles the projector between standby
mode and on. See "Starting up the
projector" on page 25 and "Shutting down
the projector" on page 46 for details.
3. Enter
Enter key when connected through USB
to a PC.
4. Left cursor
Left arrow when connected through USB
to a PC.
5. Down
Down arrow when connected through
USB to a PC.
6. PAGE UP
Page up arrow when connected through
USB to a PC. See "Remote paging
operations" on page 39 for details.
7. Up cursor
Navigates and changes settings in the
OSD. See "Using the menus" on page
26 for details.
8. Left cursor
Navigates and changes settings in the
OSD. See "Using the menus" on page
26 for details.
9. Down cursor
Navigates and changes settings in the
OSD. See "Using the menus" on page
26 for details.
10. KEYSTONE keys ( / )
Manually corrects distorted images
resulting from an angled projection. See
"Correcting keystone" on page 31 for
details.
11. STATUS
Opens the OSD STATUS menu (the
menu only opens when an input device
is detected).
1
2
3
4
5
6
7
9
8
10
11
12
13
14
15
16
26
27
28
18
19
20
21
23
24
25
17
Standard remote
22
2
4
5
6
7
9
8
10
11
12
13
14
15
16
26
27
28
18
19
20
21
22
23
24
25
17
For Japan model only
3


