


31
ENGLISH
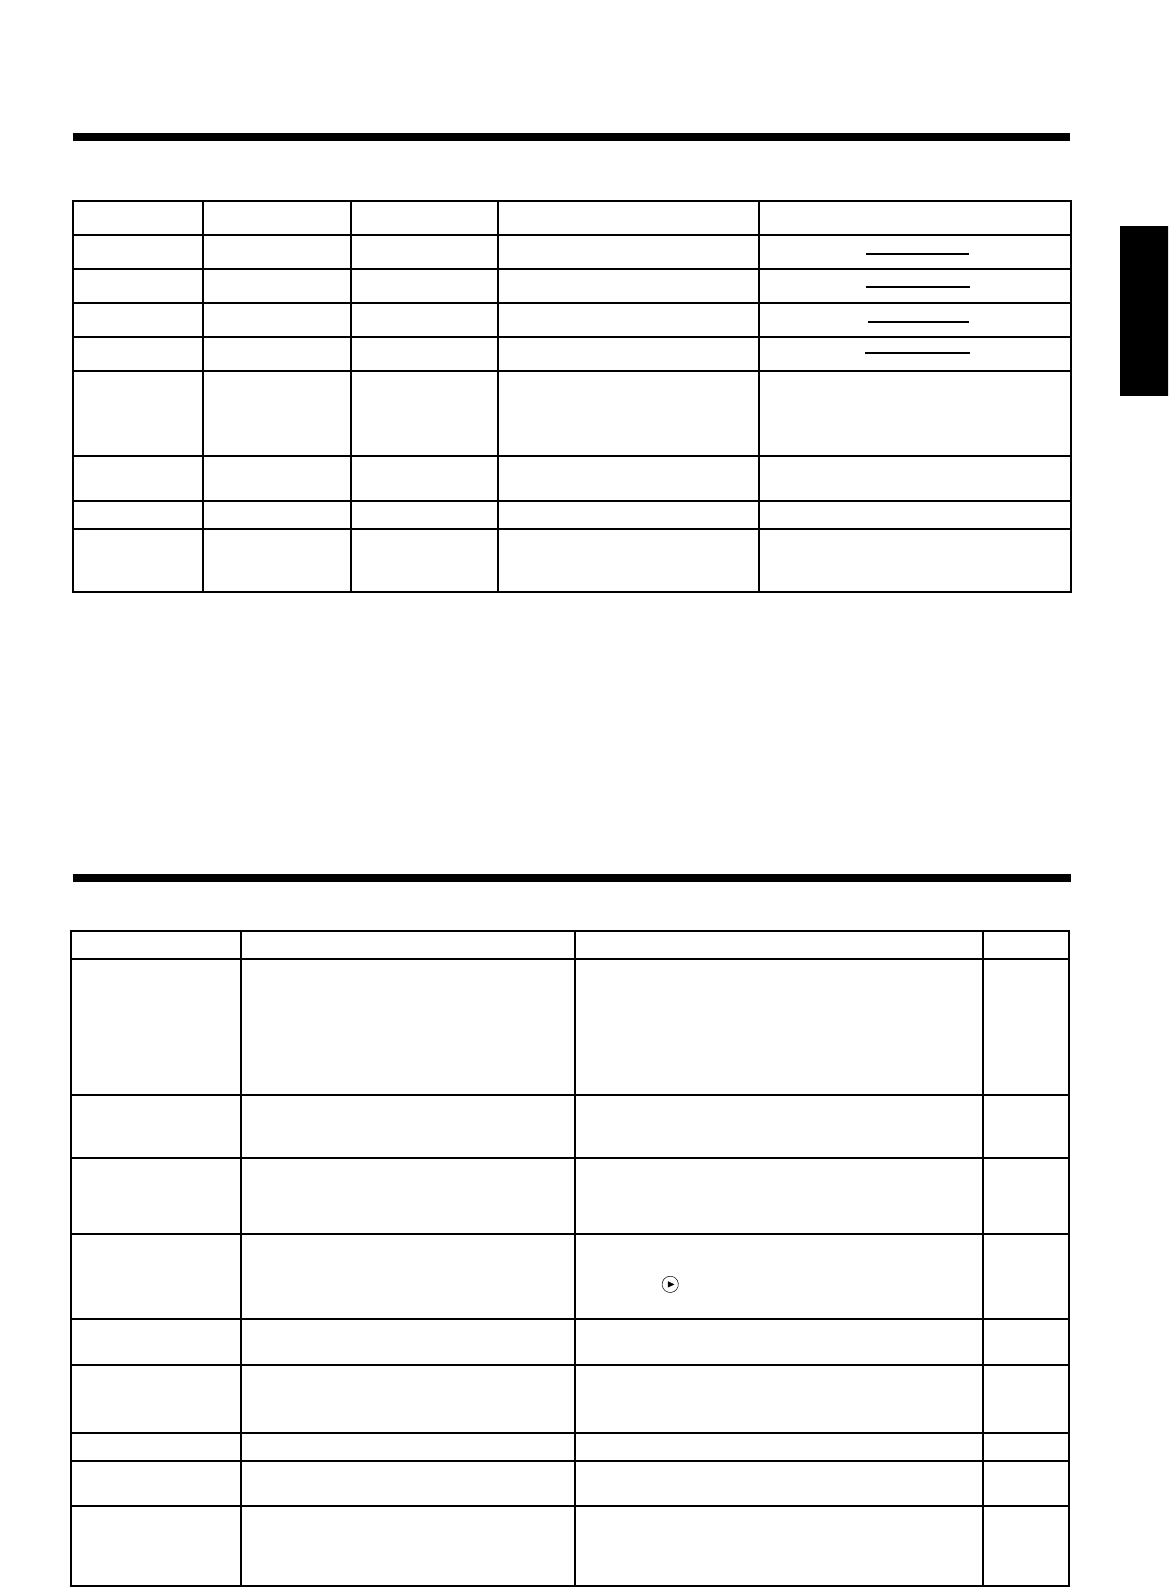
Check the following again before asking for service. If the trouble cannot be recovered, consult your dealer.
When you think something wrong
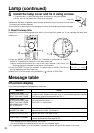
A bright dot may be seen in the picture. This is a phenomenon peculiar to the liquid crystal and is not a problem.
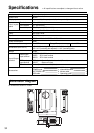
Message table (continued)
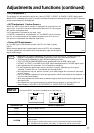
The ON indicator, LAMP indicator and TEMP indicator will light or
blink in the following cases.
Indicator display
When the LAMP indicator lights, turn the power off. If the problem cannot be recovered, contact your dealer.
*1 When the suction fan is stopped and the inside becomes hot, the power is cut automatically for cooling. (The
indicator light will go out.) In this case, turn off the power switch and allow the unit to cool down before turning the
power switch on again. The lamp will light. If the lamp does not light because it is still automatically turned off,
contact your dealer.
*2 If temperature inside the unit increases because of blocked vets, the lamp may go off for protection, and the LAMP
indicator will turn red. Should this happen, turn off the main switch, wait until the set cools down (about 45
minutes), then again turn on the main switch.
ON indicator LAMP indicator TEMP indicator Meaning Remedy
Lights orange Goes off Goes off Standby mode
Blinks green Goes off Goes off During warming up
Lights green Goes off Goes off During operation *1
Blinks orange Goes off Goes off During cooling down
Lights red Lights red Goes off Lamp cannot light *2
Cool projector by power off for 45
minutes.
If the indicator is still it, lamp may be
defective. Replace.
Lights red Blinks red Goes off
Lamp is not inserted or the
lamp door open
Securely insert the lamp or close the
lamp door.
Lights red Goes off Blinks red Cooling fan accidented Call a maintenance person.
Blinks red Blinks red Goes off
Accumulated lamp operation
time has exceeded 2,000
hours
Replace lamp and reset the
accumulated lamp operation time.
(See page 29, 30)
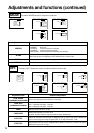
Phenomena Cause Check point Page
Power cannot be
turned on.
•The Main power is not turned on.
•The power cord is disconnected.
•60 seconds have not elapsed since the
power was turned off.
•Inside the projector too hot.
•Turn the MAIN POWER switch on.
•Insert the power cord into an AC socket.
•When the power is turned off turn the power
switch on after waiting at least 60 seconds.
•Do not block the ventilation holes.
•Clean the air filter.
•Use the projector under 35°C temperature.
P.12
P.8
P.12
P.5
P.28
No picture and
sound
•The setting of the input source is not
correct.
•Wiring to the projector is not correct.
•Set the correct input using the input select button
of the projector or the remote control.
•Connect the cable correctly.
P.7, 9,
12, 17
P.8, 27
Only picture is
displayed with no
sound
•Wiring to the projector is not correct.
•The volume is set to minimum.
•The unit enters the mute mode.
•Connect the cable correctly.
•Press the VOL button or press the MENU button
and adjust the volume.
•Press the MUTE button.
P.8, 27
P.9, 16
P.7, 9
Only sound is
heard without a
picture
•Wiring the projector is not correct.
•The brightness is set fully to the dark
side.
•Lens cap is attached.
•Connect the cable correctly.
•Press the MENU button and select BRIGHT and
press the button.
•Remove the lens cap.
P.8, 27
P.16
P.12
Color is weak and
tint is incorrect
The color and tint have been adjusted
incorrectly.
Adjust the color and tint correctly. P.16
Picture is dark
•The brightness and contrast has been
adjusted incorrectly.
•The lamp has not been adjusted.
•Adjust the brightness and contrast correctly.
•Replace the lamp with a new one.
P.16
P.29
Picture is not clear
Focus or H.PHASE is not matched. Adjust the focus or H.PHASE P.12, 16
LAMP indicator
lights red.
Trouble with the lamp.
Turn off the power and leave for 45 minutes ;
then turn the power on again.
P.31
Remote control
mouse cannot be
operated.
•Cable was connected after the power
was turned on.
•RGB signal not selected.
•
Be sure to perform procedure in the following order:
(1)Connect cable. (2)Turn on projector. (3)Turn PC on.
•Input RGB signal and select and display input
source.
P.22