


28
Windows
®
Wireless Network
Install the Printer Driver for Windows
®
12
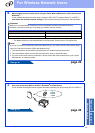
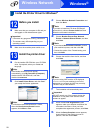
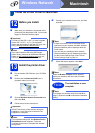
Before you install
a Make sure that your computer is ON and you
are logged on with Administrator rights.
b Make sure the machine power switch is on.
13
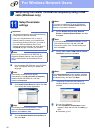
Install the printer driver
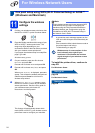
a Put the installer CD-ROM into your CD-ROM
drive. If prompted, select your model and
language.
b Click Install Printer Driver, and click Yes if
you accept the license agreement.
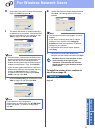
c Choose Wireless Network Connection and
then click Next.
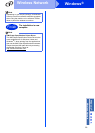
d Choose Brother Peer-to-Peer Network
Printer or Network Shared Printer, and then
click Next.
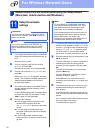
e Choose the machine from the list, and then
click Next.
f The installation will automatically start.
g When the On-Line Registration screen
appears, make your selection and follow the
on-screen instructions. Once you have
completed the registration process, click Next.
h When the Setup Complete screen appears,
check the box of the action you want to
perform, and then click Finish.
Important
• If there are any programs running, close them.
• The screens may differ depending on your
operating system.
Note
If the Brother screen does not appear
automatically, go to My Computer (Computer),
double-click the CD-ROM icon, and then
double-click start.exe.
Note
For Windows Vista
®
and Windows
®
7 users,
when the User Account Control screen
appears, click Allow or Yes.
Note
If you want to install the PS driver (BR-Script3
printer driver), choose Custom Install and then
follow the on-screen instructions.
Note
• If you choose Network Shared Printer, choose
your machine’s queue, and then click OK.
• Choose the option of the Firewall setting, and
then click Next.
Note
If you are using WEP and the LCD displayed
‘Connected’ but your machine is not found,
make sure you entered the WEP key correctly.
The WEP key is case sensitive.
Important
DO NOT cancel any of the screens during the
installation. It may take a few seconds for all
screens to appear.