


Routine maintenance
5 - 8
5
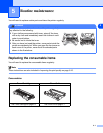
Replacing the drum unit
Note
We recommend that you clean the printer when you replace the drum unit. See Cleaning on page 5-11.
Follow these steps to replace the drum unit.
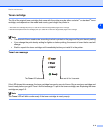
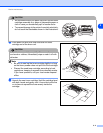
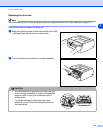
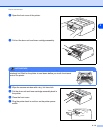
1 Make sure that the printer is turned on and the Drum LED
is blinking. Open the front cover of the printer.
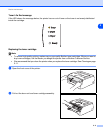
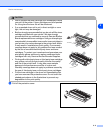
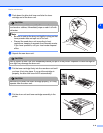
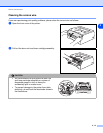
2 Pull out the drum unit and toner cartridge assembly.
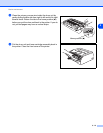
CAUTION
• We recommend that you place the drum unit and
toner cartridge assembly on a piece of disposable
paper or cloth in case you accidentally spill or
scatter toner.
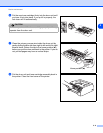
• To prevent damage to the printer from static
electricity, do not touch the electrodes shown in
the illustrations.