


5
2
For Windows
®
XP
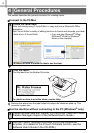
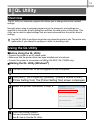
From [Control Panel], go to [Printers and Other Hardware], open [Printers and
Faxes] window.
For Windows Server
®
2003
From [Control Panel], open [Printers and Faxes] window.
For Windows Vista
®
From [Control Panel], go to [Hardware and Sound] and open [Printers].
For Windows
®
7
Click the , go to [Devices and Printers].
For Windows Server
®
2008
From [Control Panel], open [Printers].
For details, see Windows
®
Help.
3
For Windows
®
XP/Windows Server
®
2003
Choose "Brother XX-XXXX", and click [File] - [Delete].
For Windows Vista
®
/Windows
®
7/Windows Server
®
2008
Choose "Brother XX-XXXX", right click on the icon, and then click [Delete]
(Windows Vista
®
/Windows Server
®
2008)/[Remove device] (Windows
®
7).
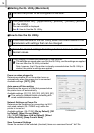
4
For Windows
®
XP/Windows Server
®
2003
Go to [File] - [Server Properties].
For Windows Vista
®
In the [Printers] window, right click and go to [Run as administrator] - [Server
Properties...].
If the [Authorization confirmation] dialog appears, click [Continue]. If the [User
Account Control] dialog appears, enter the password and click [OK].
For Windows
®
7
Choose [Fax] or [Microsoft XPS Document Writer] in the [Devices and Printers]
window, and then click [Print server properties], which appears in the menu bar.
For Windows Server
®
2008
In the [Printers] window, click [Server properties], which appears in the menu bar.
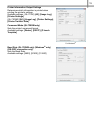
5
For Windows
®
XP/Windows Server
®
2003/Windows Server
®
2008
Click the [Drivers] tab and choose "Brother XX-XXXX". Then, click [Remove].
For Windows Vista
®
Click the [Drivers] tab and choose "Brother XX-XXXX". Then, click [Remove...].
For Windows
®
7
Click the [Drivers] tab, and then click [Change Driver Settings].
(If a User Account Control message appears, type in the password, and then click
[OK]).
Choose "Brother XX-XXXX", and then click [Remove...].