


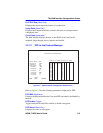

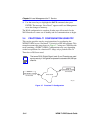

Full T1 Configuration Using PPP
WPIM-T1/DDS User’s Guide 3-13
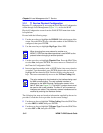
7. Use the arrow keys to highlight T1 TX Clock Source. Press the
SPACE bar to select Local (no clock source provided by telephone
company) or Loop-Timing (clock source provided by telephone
company), then press ENTER.
8. Use the arrow keys to highlight T1 Line Buildout (LBO). Press the
SPACE bar to select 0 dB unless the service provider recommends
another setting, then press ENTER.
9. Use the arrow keys to highlight T1 Network Loopback. Press the
SPACE bar to select None, then press ENTER.
10. Use the arrow keys to highlight the SAVE command, then press
ENTER. The message “SAVE DONE!” displays and Local
Management saves the changes to memory. “REBOOT IN
PROGRESS......” displays and the host platform reboots. Re-entry to
management is necessary for any further configuration.
11. Proceed to Section 3.3.2 to continue configuration.
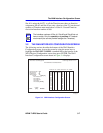
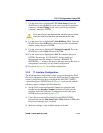
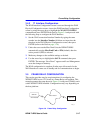
3.3.2 T1 Interface Configuration
The WAN Interface Configuration screen is accessed through the WAN
Physical Configuration screen. Access the WAN Interface Configuration
screen by using the arrow keys to highlight the WAN INT CONFIG
command and press ENTER. Refer to Figure 3-4 and proceed with the
following steps to configure the WAN Interface.
1. Set the WAN connection Interface Number by typing the same
number into the Interface Number field that was input into the
timeslots in the WAN Physical Configuration screen, then press
ENTER (refer to the Note on page 3-12).
2. Unless the user sets the Max Xmit Unit, the WPIM-T1/DDS
automatically sets the Max Xmit Unit to 1526 (default for PPP) after
the protocol manager type is selected.
3. Make any changes to the available settings as desired.
!
CAUTION
If you are using a Local clock source, set only one end of the
circuit for Local, and the other end must be set for Loop.