Frame Relay Configuration
WPIM-RT1 User’s Guide 3-17
3.4.2 T1 Interface Configuration
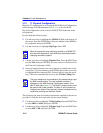
The WAN Interface Configuration screen is accessed through the WAN
Physical Configuration screen. Access the WAN Interface Configuration
screen by using the arrow keys to highlight the WAN INT CONFIG
command and press ENTER. Refer to Figure 3-4 and proceed with the
following steps to configure the WAN Interface.
1. Set the WAN connection Interface Number by typing the same
number into the Interface Number field that was input into the
timeslots in the WAN Physical Configuration screen, then press
ENTER (see the Notes on page 3-16).
2. Unless the user sets the Max Xmit Unit, the WPIM-RT1 automatically
sets the Max Xmit Unit to 1526 (default) after the active protocol
(PPP) is selected.
3. Make any changes to the available settings as desired.
4. Use the arrow keys to highlight the SAVE command, then press
ENTER. The message ““SAVE DONE!” displays and Local
Management saves the changes to memory.
The WAN configuration is complete. It takes up to 60 seconds for the
WAN Interface to come out of standby and for communications to begin.
3.5 FRAME RELAY CONFIGURATION
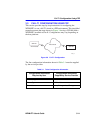
This section provides step-by-step instructions for configuring the
WPIM-RT1 to use a T1 circuit in a Frame Relay environment. This
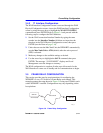
example assumes the setup shown in Figure 3-8 using two CSX400s, each
with a WPIM-RT1 installed. Configurations may vary depending on the
host platform.
Figure 3-8 Frame Relay Configuration
SITE #1
Telco Cloud
24 Timeslots
24 Timeslots
SITE #2
1482_05


