


5
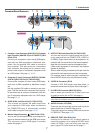
2. Installation and Connections
❷
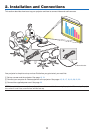
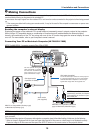
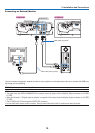
Making Connections
NOTE: When using with a notebook PC, be sure to connect the projector and notebook PC while the projector is in standby
mode and before turning on the power to the notebook PC.
In most cases the output signal from the notebook PC is not turned on unless connected to the projector before being powered
up.
* If the screen goes blank while using your remote control, it may be the result of the computer's screen-saver or power man
-
agement software.
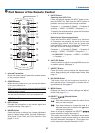
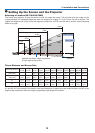
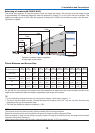
AUDIO IN
AUDIO OUT
S
-
VIDEO
IN
VIDEO
IN
L
AUDIO IN
R
SERVICE PORT
ANALOG IN-1
DIGITAL IN /
ANALOG IN-2
ANALOG IN-1
DIGITAL IN/
ANALOG IN-2
AUDIO IN
PHONE
PHONE
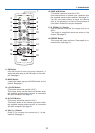
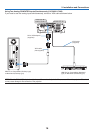
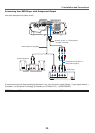
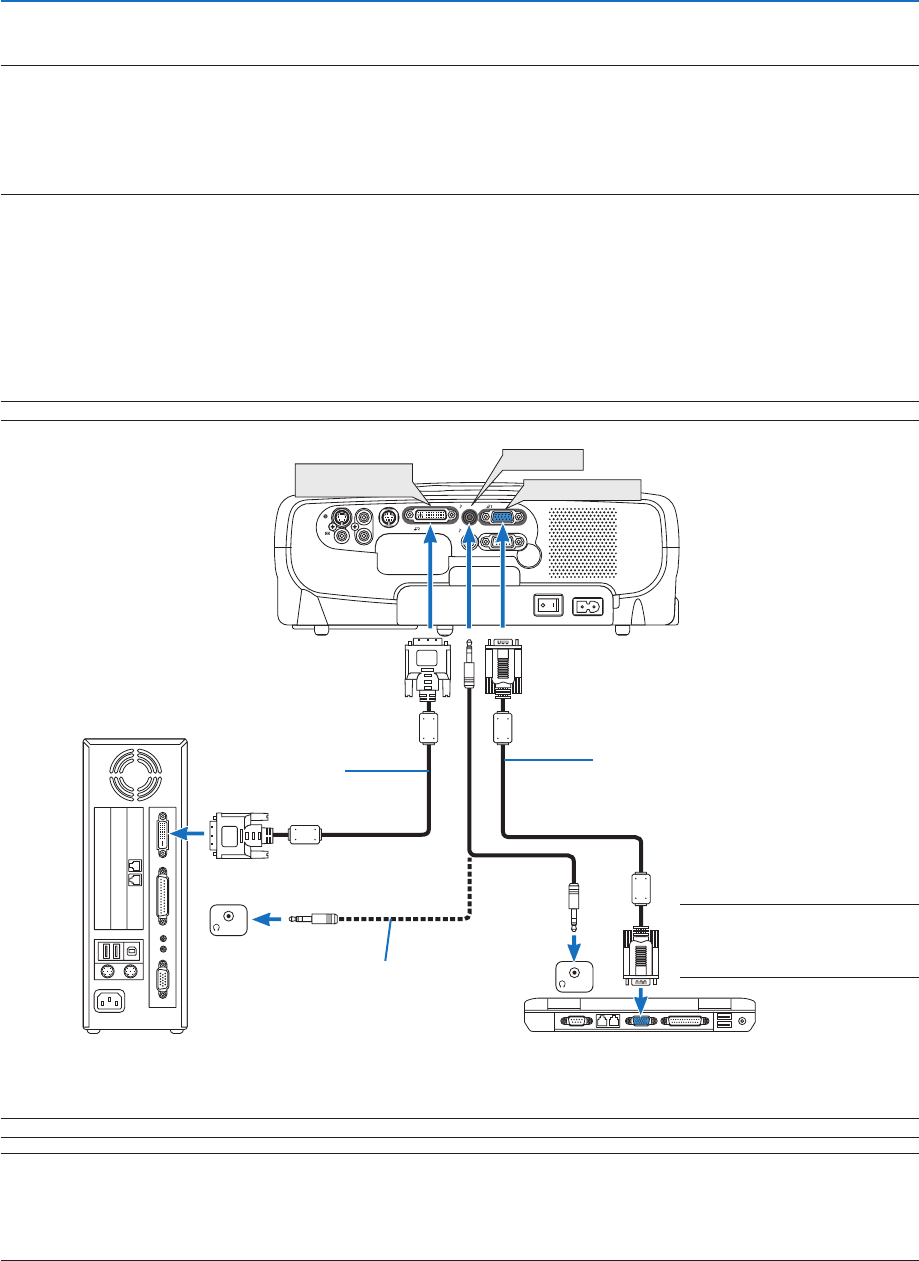
Connecting Your PC or Macintosh Computer (LV-7365/LV-7265)
NOTE: The ANALOG IN- 1 connector supports Plug & Play (DDC2).
NOTE: For older Macintosh, use a
commercially available pin adapter
(not supplied) to connect to your
Mac's video port.
NOTE: Use an audio cable without a built-in resistor. Using an audio cable with a built-in resistor turns down the sound.
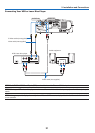
Enabling the computer’s external display
Displaying an image on the notebook PC’s screen does not necessarily mean it outputs a signal to the projector.
When using a PC compatible laptop, a combination of function keys will enable/disable the external display.
Usually, the combination of the ‘Fn” key along with one of the 12 function keys gets the external display to come
on or off. For more details, refer to your computer’s owner’s manual.
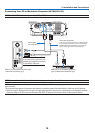
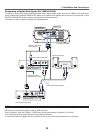
NOTE: An image may not be displayed correctly when a Video or S-Video source is played back via a commercially available
scan converter.
This is because the projector will process a video signal as a computer signal at the default setting. In that case, do the following.
* When an image is displayed with the lower and upper black portion of the screen or a dark image is not displayed correctly:
Project an image to fill the screen and then press the AUTO PC button on the remote control or the projector cabinet.