


2-6
Installation and Upgrade Guide for Cisco Unified Videoconferencing 3515 MCU12 and MCU24 Release 5.1
OL-11897-01
Chapter 2 Setting Up Your Cisco Unified Videoconferencing 3515 MCU
Cisco Unified Videoconferencing 3515 MCU Unit Initial Configuration
Setting the IP Address
This section describes how to use the serial port to configure the unit with an IP address and other
address information.
The upper serial port on the Cisco Unified Videoconferencing 3515 MCU
unit front panel is used to
assign a new IP address to your Cisco Unified Videoconferencing 3515 MCU
unit. You can assign the
IP address before or after you connect the hardware to the network.
Before You Begin
Gather the items listed in Table 2-3 to assign an IP address to the Cisco Unified
Videoconferencing 3515 MCU unit.
Procedure
Step 1 Connect the RS-232 terminal cable to the PC terminal.
Step 2 Connect the power cable.
Step 3 Start the terminal emulation application on the PC.
Step 4 Set the communication settings in the terminal emulation application on the PC as follows:
–
Baud rate: 9600
–
Data bits: 8
–
Parity: None
–
Stop bits: 1
–
Flow control: None
Step 5 Turn on the power to the Cisco Unified Videoconferencing 3515 MCU unit.
A log of the auto-boot events appears on the computer.
Step 6 When the message “Press any key to start configuration” appears on the screen, press any key within six
seconds.
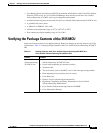
Table 2-3 Requirements for Setting the IP Address
Requirements Notes
Dedicated IP address for the Cisco Unified
Videoconferencing 3515 MCU unit
IP address of the default router the Cisco Unified
Videoconferencing 3515 MCU unit uses to
communicate over the network
Subnet mask for the Cisco Unified
Videoconferencing 3515 MCU unit if applicable
Domain Name Server and domain name for
Cisco Unified Videoconferencing 3515 MCU unit
if applicable
PC with available serial port and terminal
emulator software installed
RS-232 terminal cable (shipped with the unit)