


AccuMic Microphone — AccuMic PC
5
Technical Services Group ~ 1-800-283-5936 (USA) ~ 1-801-974-3760
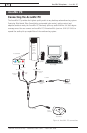
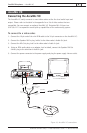
To connect the AccuMic PC
1. Connect the 10-pin plug to the 10-pin connector on the AccuMic PC.
2. Connect the Speaker Ref In (green) to the Line Out connector on the PC soundcard.
3. Connect the Mic Out (red) to the Mic In on the PC soundcard.
4. Connect the Speaker Ref Out (green) to the Speaker jack cable from the speakers.
Note:
Your speakers connect directly to the AccuMic PC to allow the echo cancellation to
work properly.
5. Connect the power connector to the power supply and plug the power supply into an outlet.
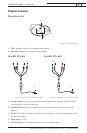
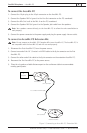
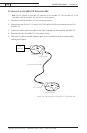
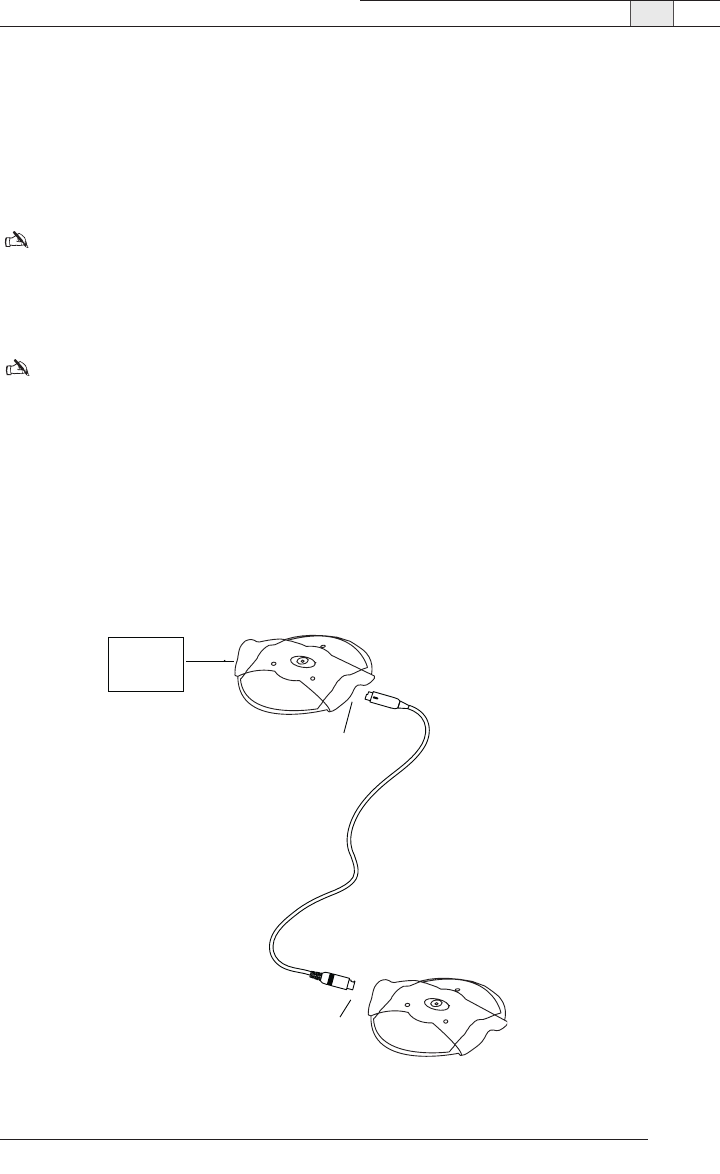
To connect an AccuMic PC Extension Mic
Note:
Do not connect an AccuMic PC Extension Mic to an AccuMic VC.The AccuMic PC is
not compatible with the AccuMic VC and will not work properly.
1. Disconnect the first AccuMic PC from the power source.
2. Connect one end of the 10' (3 meter) mini-DIN cable to the 8-pin connector on the first
AccuMic PC.
3. Connect the other end of the cable to the 8-pin connector on the extension AccuMic PC.
4. Reconnect the first AccuMic PC to the power source.
5. Place the mic pads a suitable distance apart on the conference table to accommodate
meeting participants.
8-Pin Connector
8-Pin Connector
10' (3-meter) Mini-DIN Cable
To
Computer
Extension AccuMic
First AccuMic
Figure 7.Connecting an AccuMic PC Extension Mic