Upgrading and Servicing Guide 5
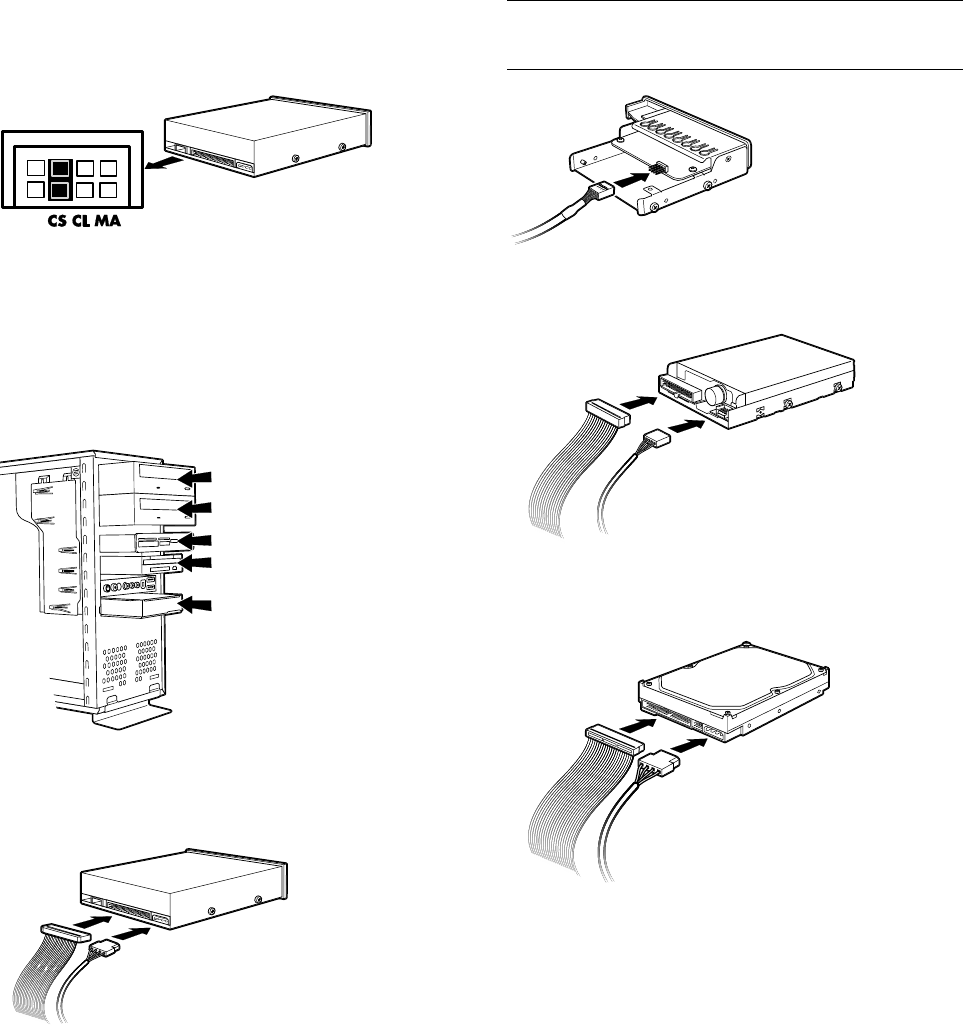
3 Make sure the jumper on the new optical drive or
hard drive is in the CS (Cable Select) position. Your
drive may vary from the illustration.
cable select jumper
4 Install four guide screws on the sides of the new
drive (two on each side). The screws help guide the
drive into its proper position in the bay.
5 Slide the drive partway into the drive bay, making
sure to align the guide screws with the guide slots.
6 Reconnect the power and data cables to your drive
as indicated in the following illustrations.
connecting the optical drive cables
NOTE:
An optical drive may include a sound cable.
Connect this cable also.
connecting the memory card reader drive cable
connecting the diskette (floppy) drive cables
connecting the hard disk drive cables
7 Push the drive the rest of the way into the bay until
the drive snaps into place.
8 Complete the procedures to replace the front panel,
replace the side panel, and close the PC. See
“opening and closing the pc“ on page 1.


