


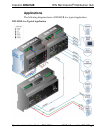

DIN Rail Cresnet
®
Distribution Hub Crestron DIN-HUB
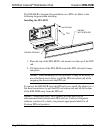
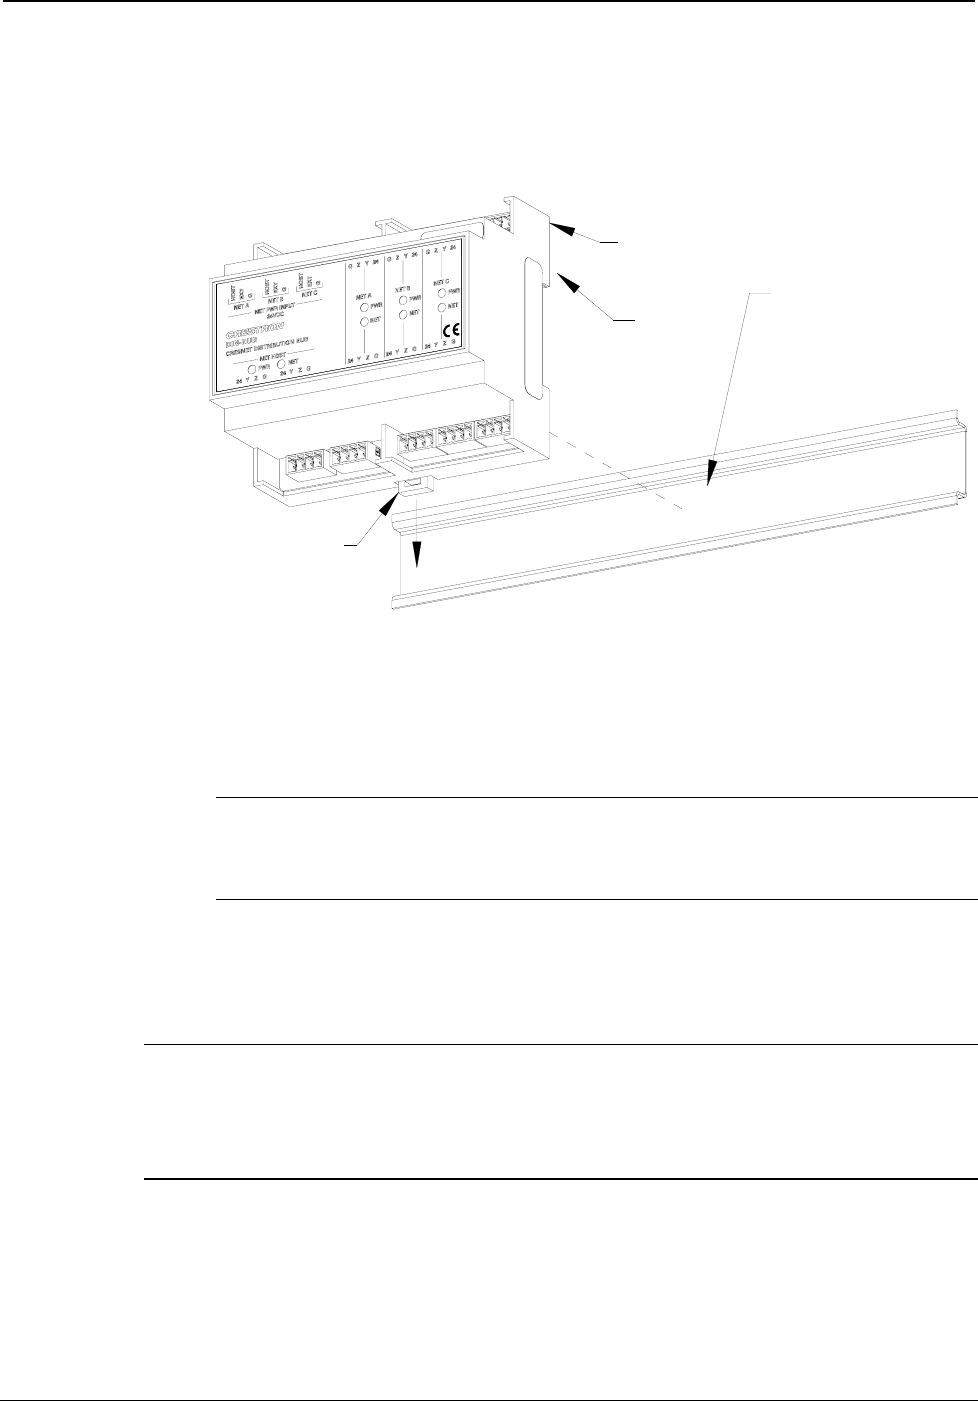
The DIN-HUB is designed for installation on a DIN rail. Refer to the
following diagram when installing.
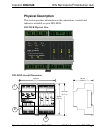
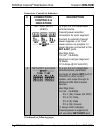
Installing the DIN-HUB
DIN-HUB
TOP
DIN RAIL
(NOT SUPPLIED)
DIN RAIL RELEASE
1. Place the top of the DIN-HUB’s rail mount over the top of the DIN
rail.
2. Tilt the bottom of the DIN-HUB toward the DIN rail until it snaps
into place.
NOTE: When mounting DIN rail products, it may be necessary to
use a flat-head screw driver to pull the DIN rail release tab while
snapping the device onto the DIN rail.
To remove the DIN-HUB from the DIN rail, use a small, flat object (i.e. a
flat-head screwdriver) to pull the DIN rail release tab and tilt the bottom
of the DIN-HUB away from the DIN rail.
NOTE: Certain third party DIN cabinets provide space for an
informational label between each DIN rail row. Crestron’s Engraver
software (version 4.0 or later) can generate appropriate labels for all
Crestron DIN rail products.
10 • DIN Rail Cresnet Hub: DIN-HUB Operations & Installation Guide – DOC. 6671A