


dCS Verona User Manual Manual for Software Issue 1.0x
dCS Ltd September 2004
Manual filename: Verona Manual v1.0x.doc Page 20 email: more@dcsltd.co.uk
English version web-site: www.dcsltd.co.uk
THE HARDWARE – CONTROLS AND CONNECTORS
Front Panel
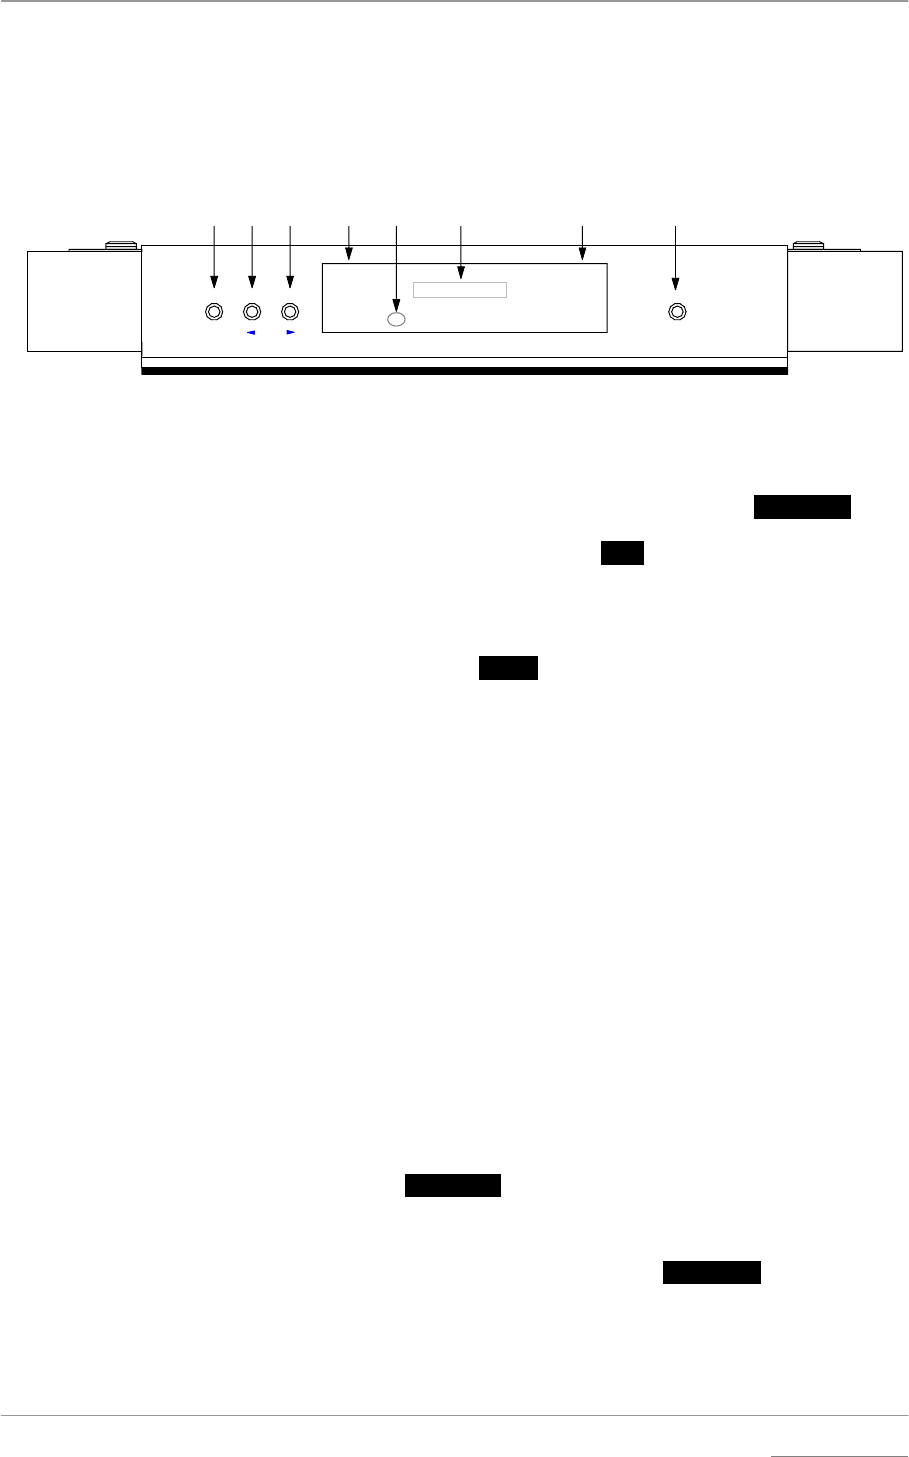
A BC D E F G H
Men uPower
Clock
Frequency
STBY
PWR
OK
Master Clock
dCS Verona
Dither
Step Select
DITH
EXT
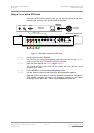
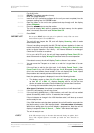
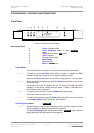
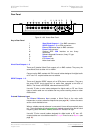
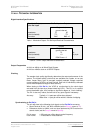
Figure 5 – dCS Verona Front Panel
Key to Front Panel
A Power / Standby button
B Clock Frequency button or Menu
Step Back
button
C Dither button or Menu
Step button
D Status indicator
E Remote Control sensor
F Main Display
G Mode indicator
H Menu or
Select button
Power Button x
This button doubles as a power on / off switch and a standby mode switch.
do this: To switch on, press the Power button briefly. If power is available, the PWR
indicator will light and Verona will run through the power up routine.
Note that the Power button will not click when turning power on – this is normal.
do this: When you have finished listening, press the Power button briefly to set the unit
to standby mode.
The outputs will mute, all displays will turn off except the PWR and STBY
indicators. In this mode, Verona uses less power. If power is switched off or
fails, Standby mode is cancelled.
do this: To restore normal operation, press the Power button briefly again.
Verona will power up ready for use.
do this: To switch off completely, press the Power button and hold it for a few seconds
until the Main Display shows Power Dn, then release it.
Clock Frequency Button (
Step Back)
do this: Press this button to set the clock frequency to either 44.1kHz (usually for CD or
SACD transports) or 48kHz (usually for DVD transports).
The Clock Frequency button doubles as the Menu
Step Back button, used for
paging backwards through the Menu (see page 14).