


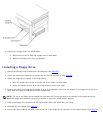
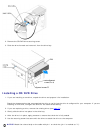

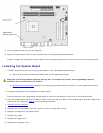

4. After the drive is in place, apply pressure to ensure that the drive is fully seated.
5. Use the securing screw that came with the drive to attach the drive to the computer.
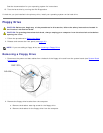
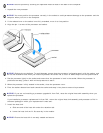
NOTICE: Match the colored strip on the cable with pin 1 on the drive (pin 1 is marked as "1").
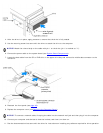
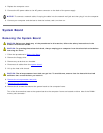
6. Connect the power cable to the system board (see System Board Components
).
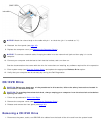
7. Locate the data cable from the CD or DVD drive in the upper drive bay and connect its middle data connector to the
new drive.
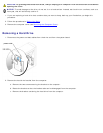
8. Reattach the front panel (see page 48).
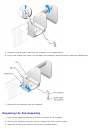
9. Replace the computer cover (see Replacing the Computer Cover
).
NOTICE: To connect a network cable, first plug the cable into the network wall jack and then plug it into the computer.
10. Connect your computer and devices to electrical outlets, and then turn them on.
11. See the documentation that came with the drive for instructions on installing any software required for drive operation.