


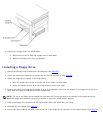

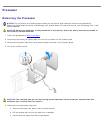
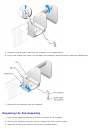

1. Slide the power supply into place.
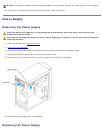
2. Replace the four screws that secure the power supply to the back of the computer.
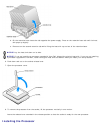
3. Reinstall the fan assembly
.
4. Reconnect the DC power cables to the drives and system board.
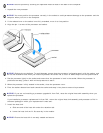
5. Replace the computer cover.
6. Connect the AC power cable to the AC power connector on the back of the power supply.
NOTICE: To connect a network cable, first plug the cable into the network wall jack and then plug it into the computer.
7. Connect your computer and devices to electrical outlets, and turn them on.
Battery
CAUTION: Before you begin any of the procedures in this section, follow the safety instructions located in
the Product Information Guide.
NOTICE: To prevent static damage to components inside your computer, discharge static electricity from your body
before you touch any of your computer's electronic components. You can do so by touching an unpainted metal surface
on the computer chassis.
A coin-cell battery maintains computer configuration, date, and time information. The battery can last several years.
If you have to repeatedly reset time and date information after turning on the computer, replace the battery.
CAUTION: A new battery can explode if it is incorrectly installed. Replace the battery only with the same
or equivalent type recommended by the manufacturer. Discard used batteries according to the
manufacturer's instructions.
To replace the battery:
1. Record all the screens in system setup
so that you can restore the correct settings in step 8.
2. Follow the procedures in Before You Begin
.
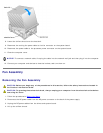
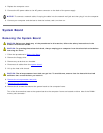
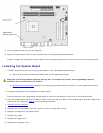
3. Locate the battery socket on the system board
.
NOTICE: If you pry the battery out of its socket with a blunt object, be careful not to touch the system board with the
object. Ensure that the object is inserted between the battery and the socket before you attempt to pry out the
battery. Otherwise, you may damage the system board by prying off the socket or by breaking circuit traces on the
system board.
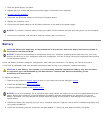
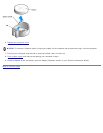
4. Remove the battery by carefully prying it out of its socket with your fingers or with a blunt, nonconducting object such
as a plastic screwdriver.
5. Insert the new battery into the socket with the side labeled "+" facing up, and snap the battery into place.