


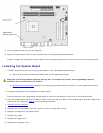

Processor
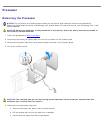
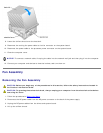
Removing the Processor
NOTICE: Do not perform the following steps unless you are familiar with hardware removal and replacement.
Performing these steps incorrectly could damage your system board. For technical service, see "Contacting Dell" in the
Owner's Manual.
CAUTION: Before you begin any of the procedures in this section, follow the safety instructions located in
the Product Information Guide.
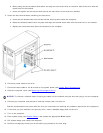
1. Follow the procedures in Before You Begin
.
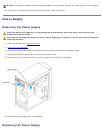
2. Disconnect the cooling fan power cable from the fan connector on the system board.
3. Disconnect the power cable from the processor power connector on the system board.
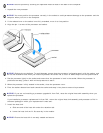
4. Lift up the airflow shroud.
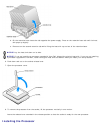
CAUTION: The heat sink can get very hot during normal operation. Be sure that the heat sink has had
sufficient time to cool before you touch it.
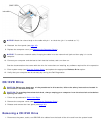
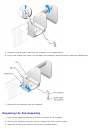
5. Remove the microprocessor heat sink:
a. Twist the heat sink from side to side to break the seal.
b. Pull the release tab out until the heat sink is released.
c. Lift the heat sink away from the microprocessor.