


10. Lift the assembly away from the system board and place it in a secure location.
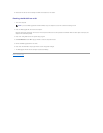
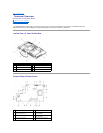
Replacing the System Fan and Heat Sink Assembly
1. Follow the procedures in Before You Begin.
2. To replace the system fan and heat sink assembly, connect the system fan cable to the connector (SYS_FAN1) on the system board.
3. Tighten the two captive screws securing the heat sink to the system board.
4. Replace the three screws securing the system fan to the system board.
5. Replace the back I/O panel (see Replacing the Back I/O Panel).
6. Replace the stand (see Replacing the Stand).
7. Replace the shield (see Replacing the Shield).
8. Replace the computer cover (see Replacing the Computer Cover).
Back to Contents Page
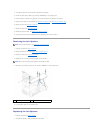
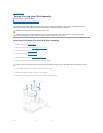
1
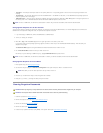
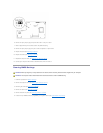
heat sink captive screws (2)
2
system fan screws (3)
3
system fan cable