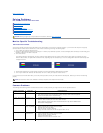
Video Problems
Product Specific Problems
spots
l Pixel that is permanently off is a natural defect that can occur in LCD technology.
Stuck-on Pixels
LCD screen has
bright spots
l Cycle power on-off.
l Pixel that is permanently off is a natural defect that can occur in LCD technology.
Brightness Problems
Picture too dim or
too bright
l Reset the monitor to Factory Settings.
l Auto Adjust via OSD.
l Adjust brightness & contrast controls via OSD.
Geometric Distortion
Screen not
centered correctly
l Reset the monitor to Factory Settings.
l Auto Adjust via OSD.
l Adjust brightness & contrast controls via OSD.
NOTE: When using 'DVI-D', the positioning adjustments are not available.
Horizontal/Vertical Lines
Screen has one or
more lines
l Reset the monitor to Factory Settings.
l Perform Auto Adjust via OSD.
l Adjust Phase and Pixel Clock controls via OSD.
l Perform monitor self-test feature check and determine if these lines are also in self-test mode.
l Check for bent or broken pins in the video cable connector.
NOTE: When using 'DVI-D', the Pixel Clock and Phase adjustments are not available.
Synchronization Problems
Screen is
scrambled or
appears torn
l Reset the monitor to Factory Settings.
l Perform Auto Adjust via OSD.
l Adjust Phase and Pixel Clock controls via OSD.
l Perform monitor self-test feature check to determine if scrambled screen appears in self-test mode.
l Check for bent or broken pins in the video cable connector.
l Restart the computer in the safe mode.
Safety Related Issues
Visible signs of
smoke or sparks
l Do not perform any troubleshooting steps.
l Contact Dell immediately.
Intermittent Problems
Monitor
malfunctions on &
off
l Ensure that the video cable connecting the monitor to the computer is connected properly and is secure.
l Reset the monitor to Factory Settings.
l Perform monitor self-test feature check to determine if the intermittent problem occurs in self-test mode.
Missing Color
Picture missing
color
l Perform monitor self-test feature check.
l Ensure that the video cable connecting the monitor to the computer is connected properly and is secure.
l Check for bent or broken pins in the video cable connector..
Wrong Color
Image is displayed
with the wrong
colors.
l Change the Color Setting Mode to Graphics or Video using the OSD.
l Try different Color Preset Settings in Color Settings OSD.
l Adjust R/G/B value in Color Settings OSD if the Color Management is turned off.
l Change the Input Color Format to PC RGB or YPbPr in the Advance Setting OSD.
Imageretentionfroma
static image left on the
monitorforalongperiod
of time
Faint shadow from
the static image
displayed appears
on the screen
l Use the Power Management feature to turn off the monitor at all times when not in use (for more
information, see Power Management Modes).
l In OSD Menu, under OTHER SETTINGS, select Enable LCD Conditioning. Using this option may take
several hours before the image is eliminated.
l Alternatively, use a dynamically changing screensaver.
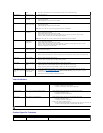
Common Symptoms
What You Experience
Possible Solutions
No Video
No signal indicator is displayed
l Check Video Input Selection.
¡ Composite: Yellow colored RCA jack.
¡ S-Video: Typically a round 4 pin jack.
¡ Component: Red, Blue, Green colored RCA jacks.
Low Quality DVD
playback
Picture not crisp and some color distortion
l Check DVD connection and use the best available video cable.
¡ Composite gives good picture.
¡ S-Video gives better picture.
¡ Component gives the best picture.
Blinking Video
Video is blinking or discontinuous
l Check DVD connection and use the best available video cable.
¡ Composite gives good picture.
¡ S-Video gives better picture.
¡ Component gives the best picture.
l Check if DVD player is HDCP compliant.
¡ Some non-
compliant players may exhibit blinking video and others will display
a raster screen (image larger or smaller than the screen).
NOTE: When choosing S-Video,CompositeorComponentvideo,AutoAdjustfunctionisnotavailable.
Common Symptoms
What You Experience
Possible Solutions
Screen image is too small
Image is centered on screen, but does not
fill entire viewing area
l Check the Scaling Ratio setting in Image Setting OSD
l Reset the monitor to Factory Settings.


