


Removing the Card Fan
1. Follow the procedures in Before You Begin.
2. Remove the computer cover (see Removing the Computer Cover).
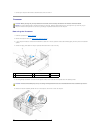
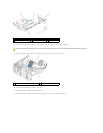
3. Disconnect the card fan cable from the system board.
4. Remove any cables from the routing clips on the top of the card fan assembly.
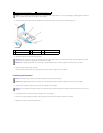
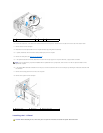
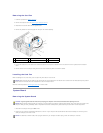
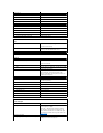
5. Lift the fan release lever, then slide the fan toward the back of the computer to release the four fan tabs from the four keyhole slots in the bottom
cover.
6. Remove the fan from the computer being careful of the front hard drive's power and hard drive cables.
Installing the Card Fan
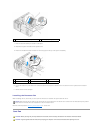
When reinstalling the fan, ensure that you do not pinch any wires that run near the fan.
Follow the removal procedure (Removing the Card Fan) in reverse order.
System Board
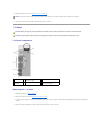
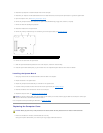
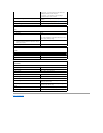
Removing the System Board
1. Shut down the computer through the Start menu.
2. Ensure that your computer and attached devices are turned off. If your computer and attached devices did not automatically turn off when you shut
down your computer, turn them off now.
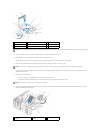
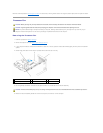
1
fan release lever
2
fan release lever tab
3
processor fan
4
card fan
NOTICE: Ensure that the four fan tabs are fully inserted into the four keyhole slots in the bottom cover so that the fan can slide back fully into position.
Ensure that the fan release lever tab is seated into its slot in the bottom cover.
CAUTION: To guard against electrical shock, always unplug your computer from the electrical outlet before opening the cover.
NOTICE: Before touching anything inside your computer, ground yourself by touching an unpainted metal surface, such as the metal at the back of the
computer. While you work, periodically touch an unpainted metal surface to dissipate any static electricity that could harm internal components.
NOTICE: To disconnect a network cable, first unplug the cable from your computer and then unplug it from the network port or device.